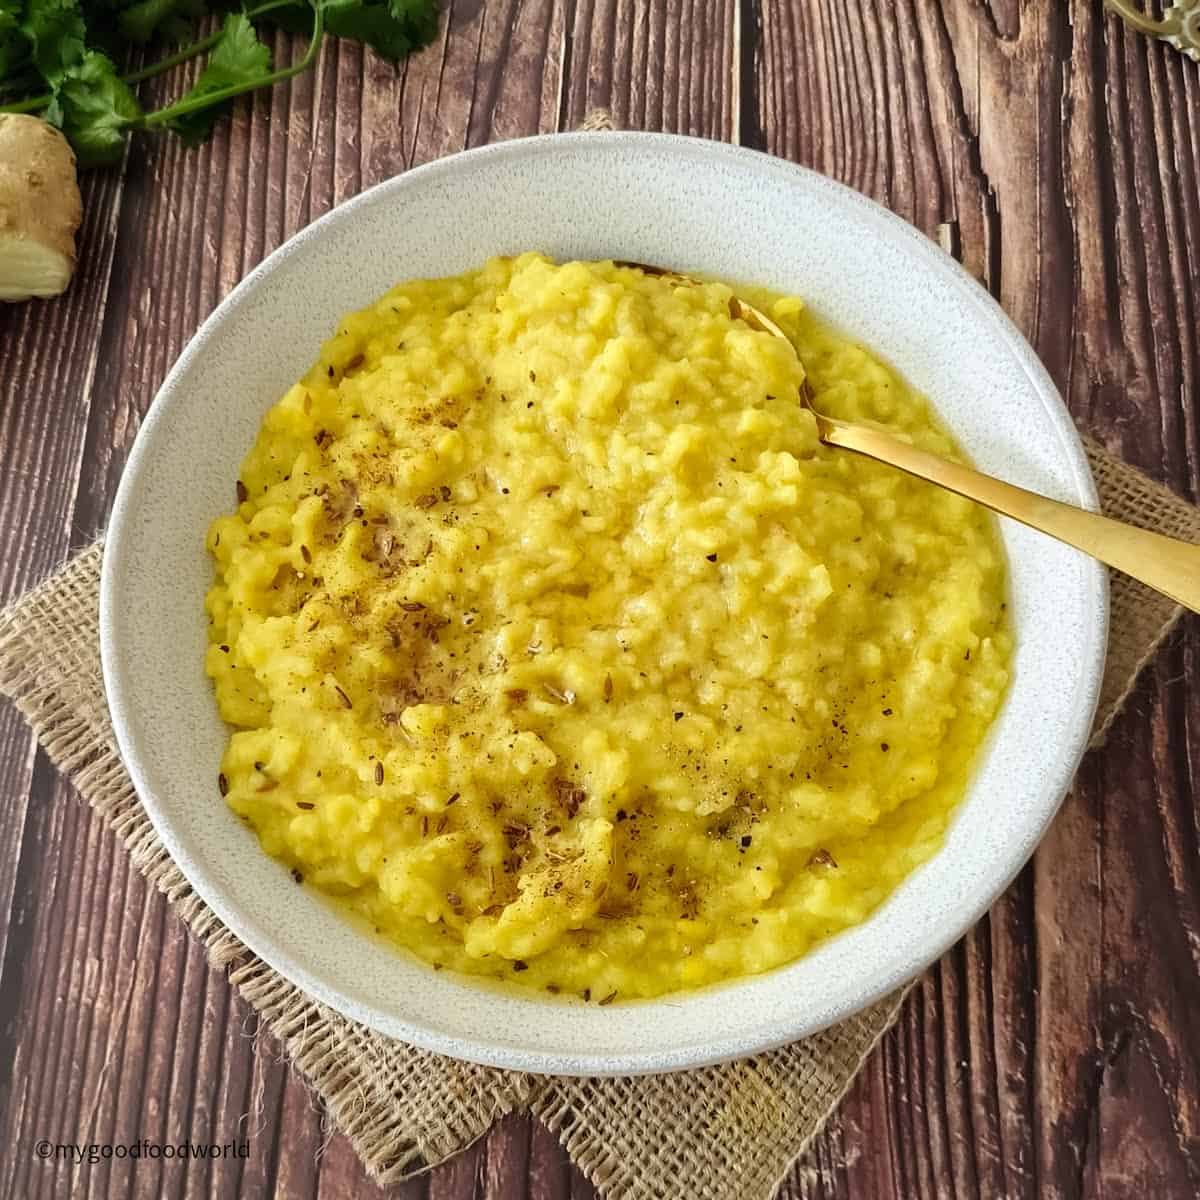
Looking for a quick, nourishing kitchari recipe? This easy Instant Pot version is made with rice, split mung lentils, and gut-friendly spices for a traditional Ayurvedic meal that's soothing, wholesome, and ready in under 30 minutes. Great for a gentle cleanse or just a cozy dinner.
Save This Recipe
Enter your email & I'll send it to your inbox.
By submitting this form, you consent to receive emails from MyGoodFoodWorld
A kitchari cleanse is something I look forward to after every trip. It's the comfort food I come home to every time. Or really, on any day when I want something soothing, healthy, and easy to digest. My kitchari recipe has a flavor profile similar to my buttered rice with yellow lentil soup. Delicious!
What I love about it is that it's made the traditional Ayurvedic way. And what makes it extra special for me is how effortlessly it comes together in the Instant Pot. I love that I can throw everything in, walk away, and come back to a warm and nourishing meal without having to stir or watch over it.
Why you'll love this simple kitchari recipe:
Made in the Instant Pot (easy and hands-free)
Ready in under 30 minutes
Gentle on digestion, gluten free, and allium free
Great for Ayurvedic cleansing and everyday meals
Customisable with vegetables and spices (see section below for suggestions)
Heads up: I'm here to share helpful info, not medical advice. Always double-check ingredient labels-products can vary, and allergens can sneak in. If you have food allergies, make sure everything you use works for you.
This post includes helpful tips, but if you're in a hurry, use the "Jump to Recipe" or section links to skip ahead.
Jump to:
What is Kitchari?
Kitchari is a one pot Indian detox meal mentioned in ancient Ayurvedic texts.
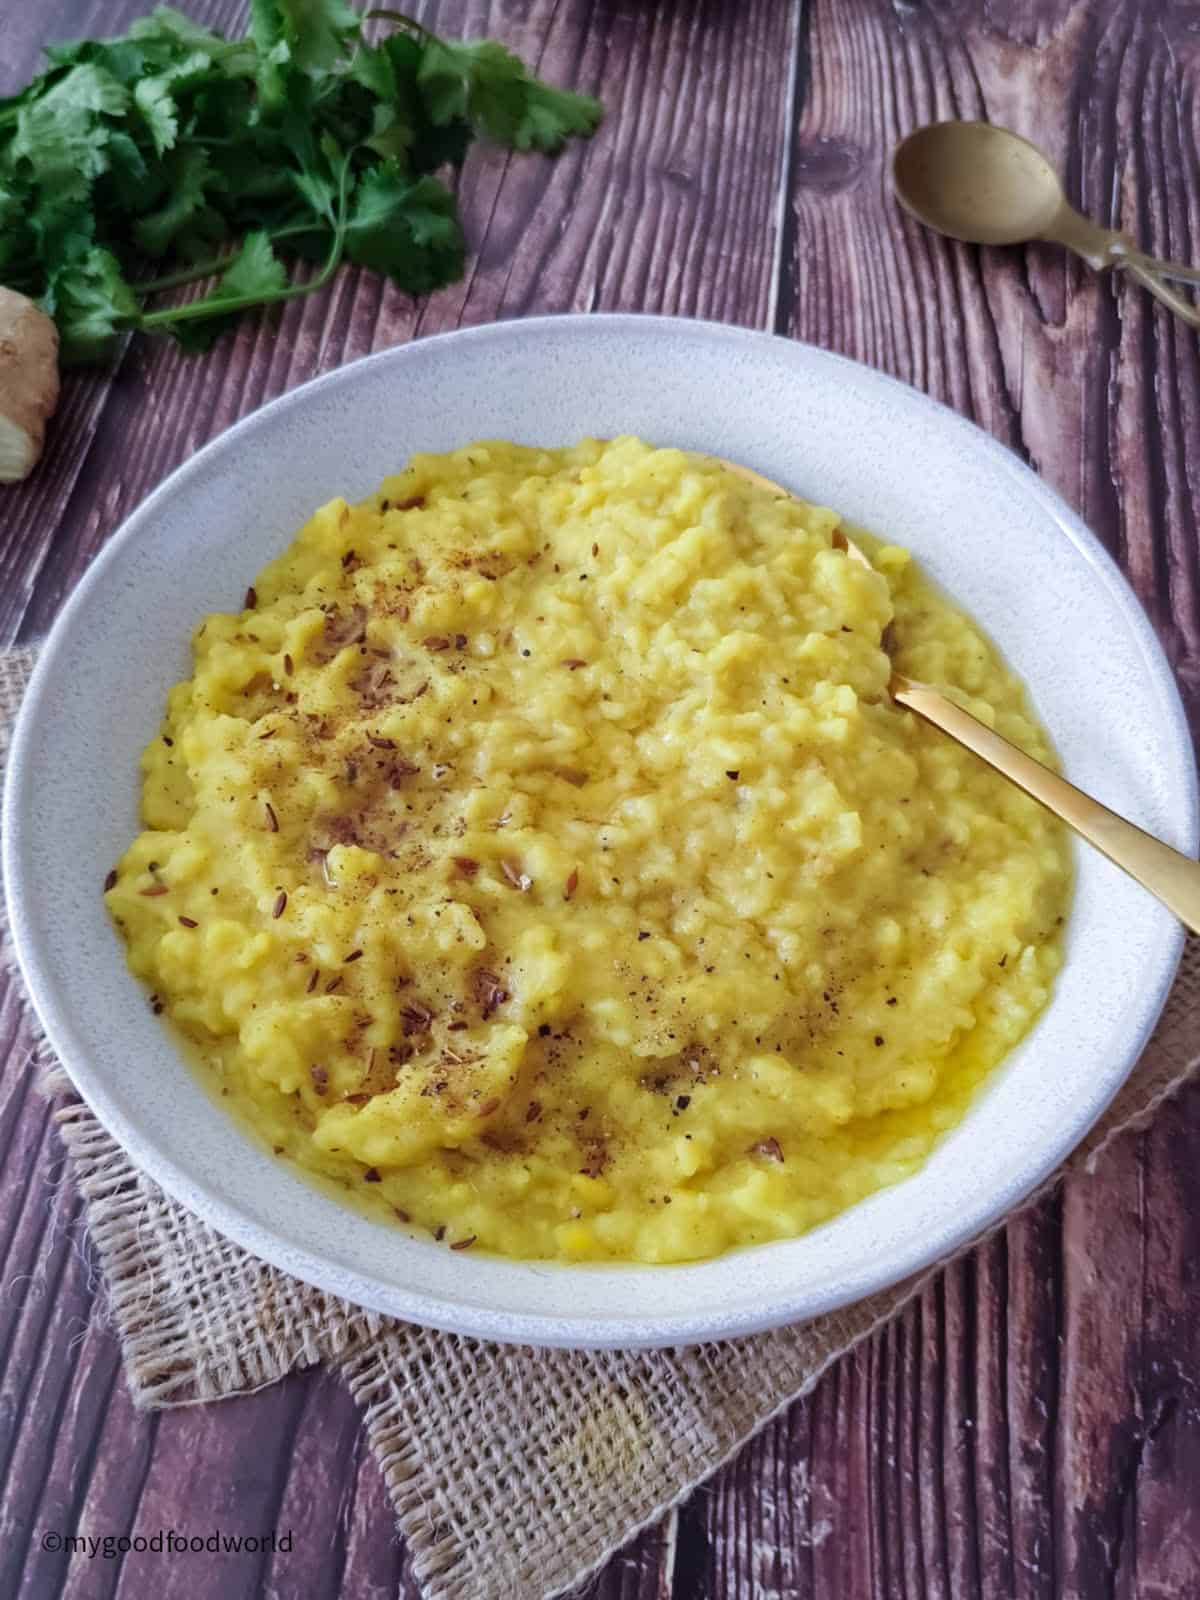
The base of kitchari is rice and split mung (yellow lentils), cooked to an oatmeal-like consistency and flavored with spices like ginger, cumin, and asafoetida sautéed in ghee. While kitchari may seem carb-heavy, the balance of lentils and spices makes it incredibly easy to digest, soothes the gut, and supports digestive health.
There are many variations of kitchari out there-some with vegetables and more spices than I've used here (see the section below if you'd like to add extras). But a traditional kitchari recipe doesn't call for any vegetables or a long list of ingredients!
Ghee is an essential part of Ayurvedic kitchari. That said, you can easily make a vegan version by swapping the ghee for coconut oil or any plant-based oil you prefer.
Is kitchari good for gut health?
Yes, kitchari is good for gut health. This Ayurvedic dish is made with split mung lentils and rice, which are both easy to digest and gentle on the stomach. The spices used in kitchari, such as ginger, cumin, turmeric, and asafoetida, support digestion and help reduce bloating. Ghee, another key ingredient, nourishes the gut lining and aids in better absorption of nutrients. Whether you're doing a gentle cleanse or just want a soothing meal, this kitchari recipe is a great choice for supporting gut health.
Ingredients You'll Need
For the complete list of ingredients, their exact quantities, and the full instructions, scroll down to the recipe card below.
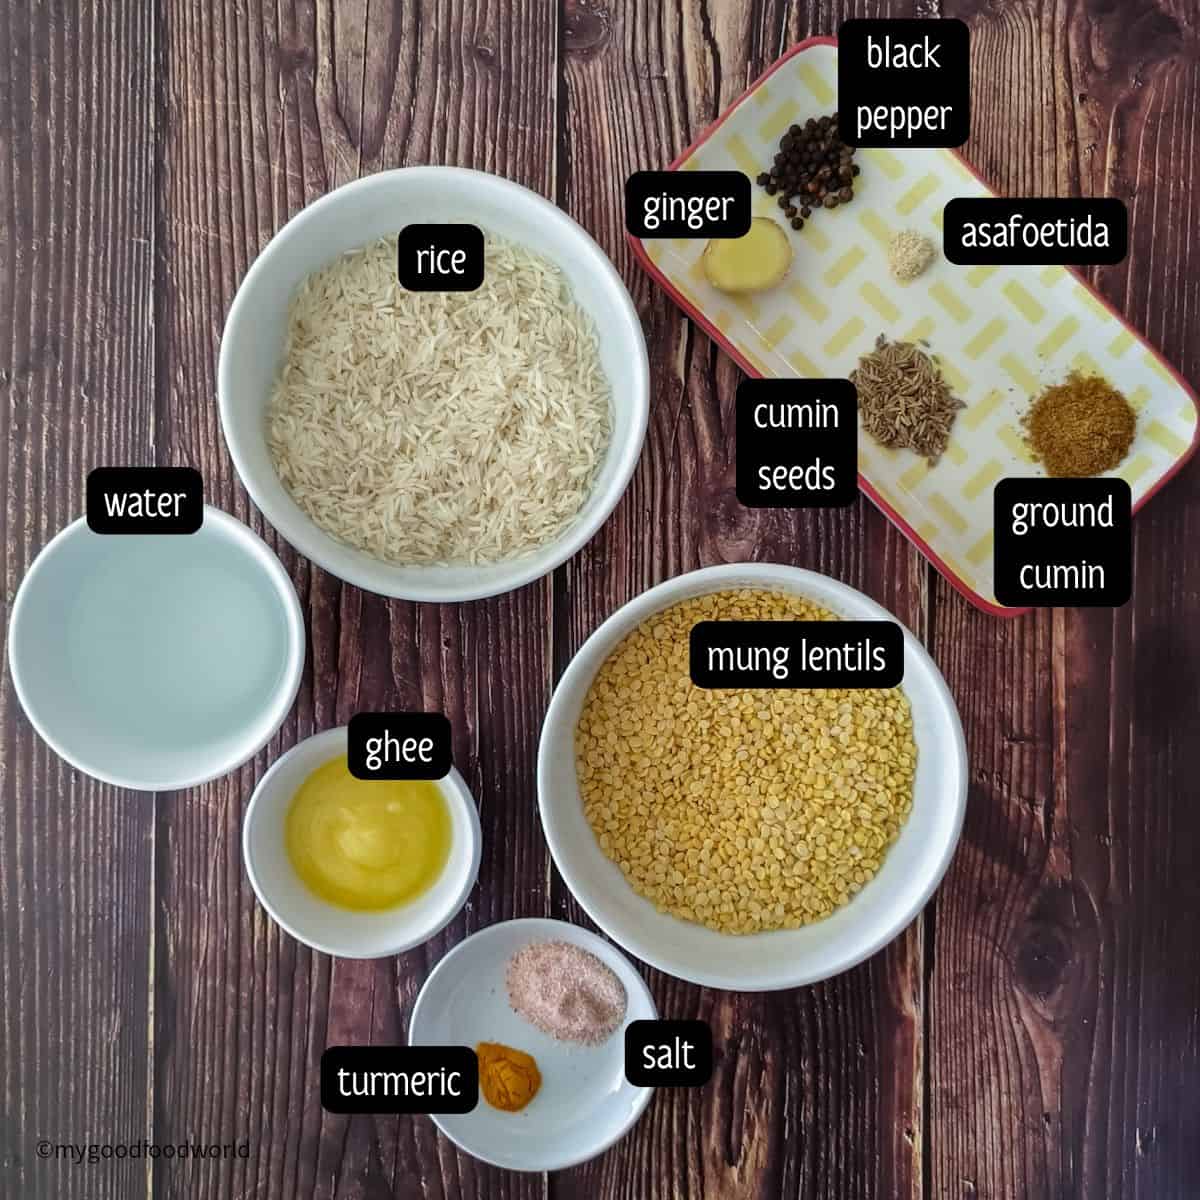
Mung lentils: Known as mung dal in India, these are split mung beans. They're yellow and often referred to as yellow lentils.
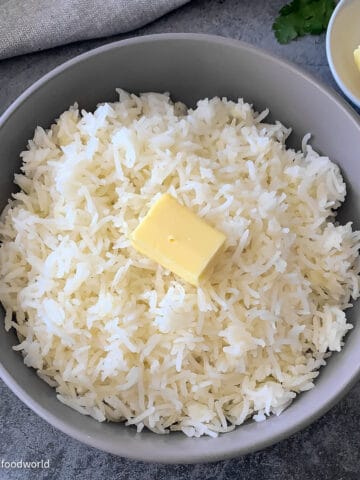
Rice: I use regular white Basmati, but you can use any rice you like. Just keep in mind that the cooking time will vary depending on the type.
Spices: Pantry staples like cumin seeds, ground cumin, black pepper, turmeric, ginger, and salt. I recommend not skipping the asafoetida, as it's known for its gut-healing properties. Just make sure yours is gluten-free.
Ghee: It gives the kitchari a lovely flavor and creaminess. Ghee is also valued in Ayurveda for its healing properties. Don't skip it unless you absolutely can't have it. If needed, coconut oil is a good substitute.
Optional garnish: Some more ghee and ground cumin or bhuna jeera for an extra depth of flavor.
How To Make Kitchari
Here's a step-by-step guide to making Instant Pot kitchari. Also, see the video at the end of the recipe card below.
Before you start making this recipe, make a coarse paste of the ginger and black pepper.
Step 1: Sauté and rinse the rice and lentils
Set the Instant Pot to sauté mode and over medium heat, stir the rice and lentils until they release a lovely aroma.

Tip them into a bowl and rinse until the water runs clear. Drain and set aside.
Lightly sautéing the rice and lentils lifts the overall aroma of the kitchari and gives the dish a deeper color.
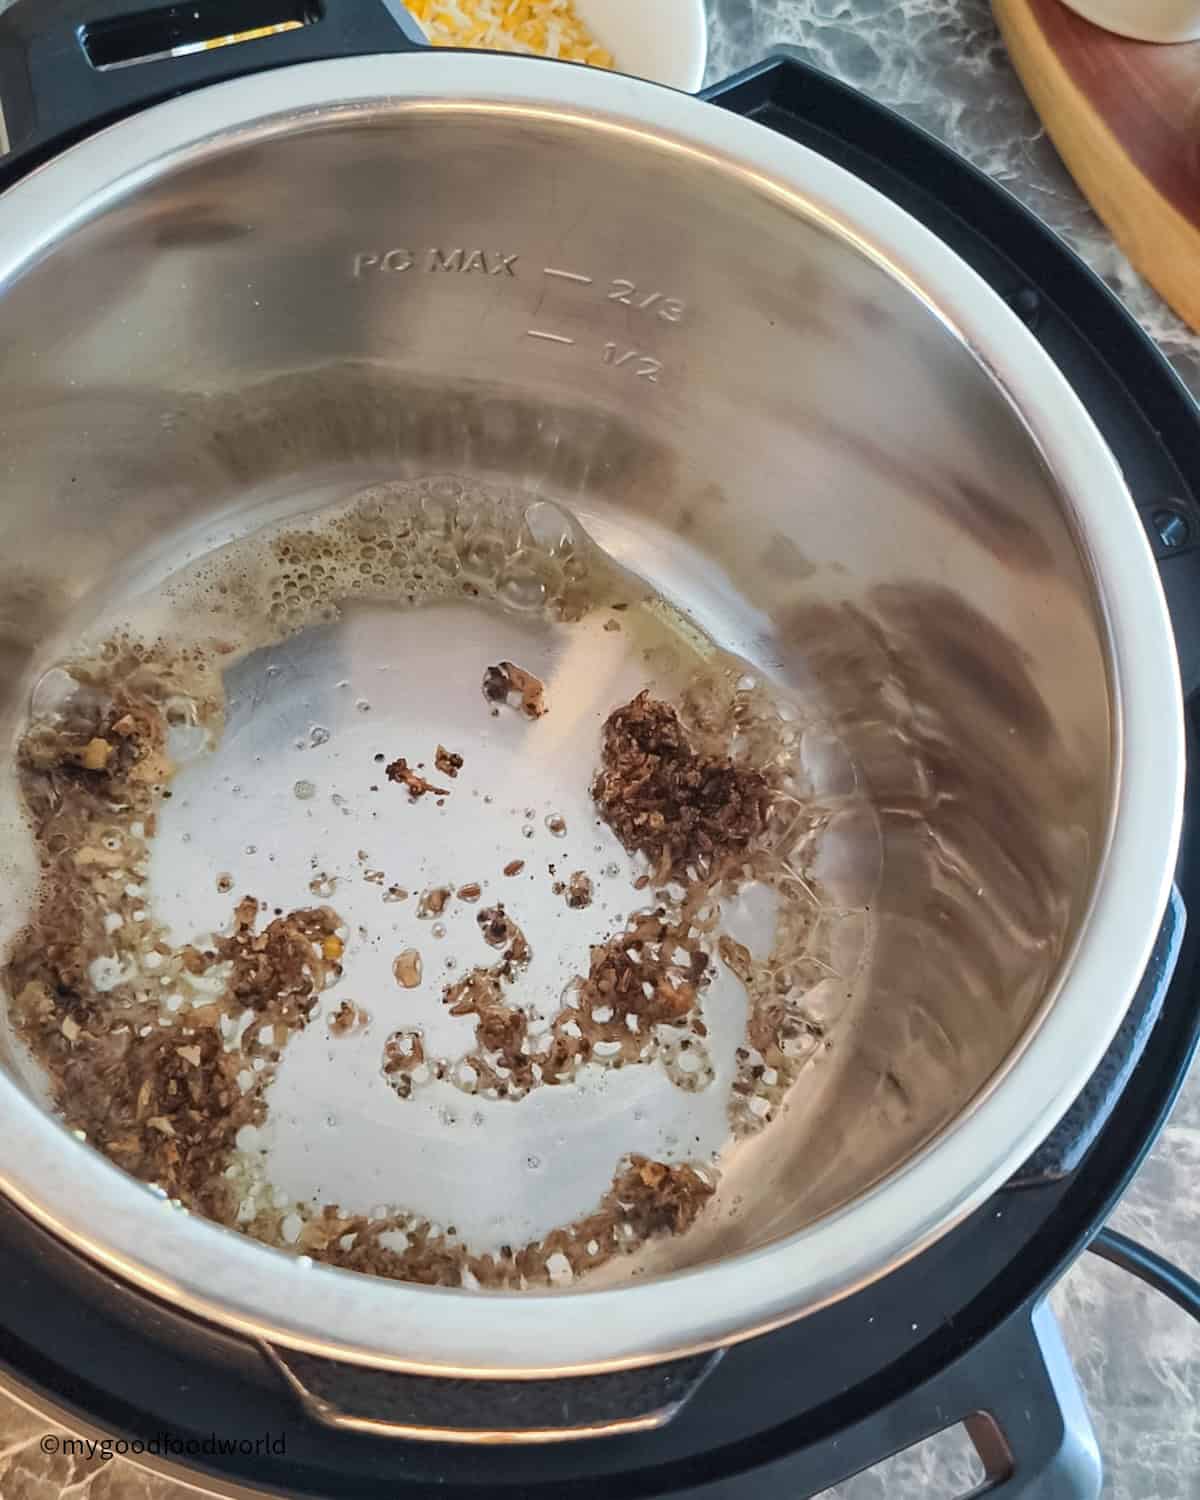
Step 2: Sauté the spices
Set the Instant Pot to sauté mode and fry the whole cumin and the ginger-pepper paste in ghee.
Add the rinsed Basmati and lentils. Pour in the measured quantity of water and the remaining spices. Mix well.
Tip: For faster cooking, add hot water.

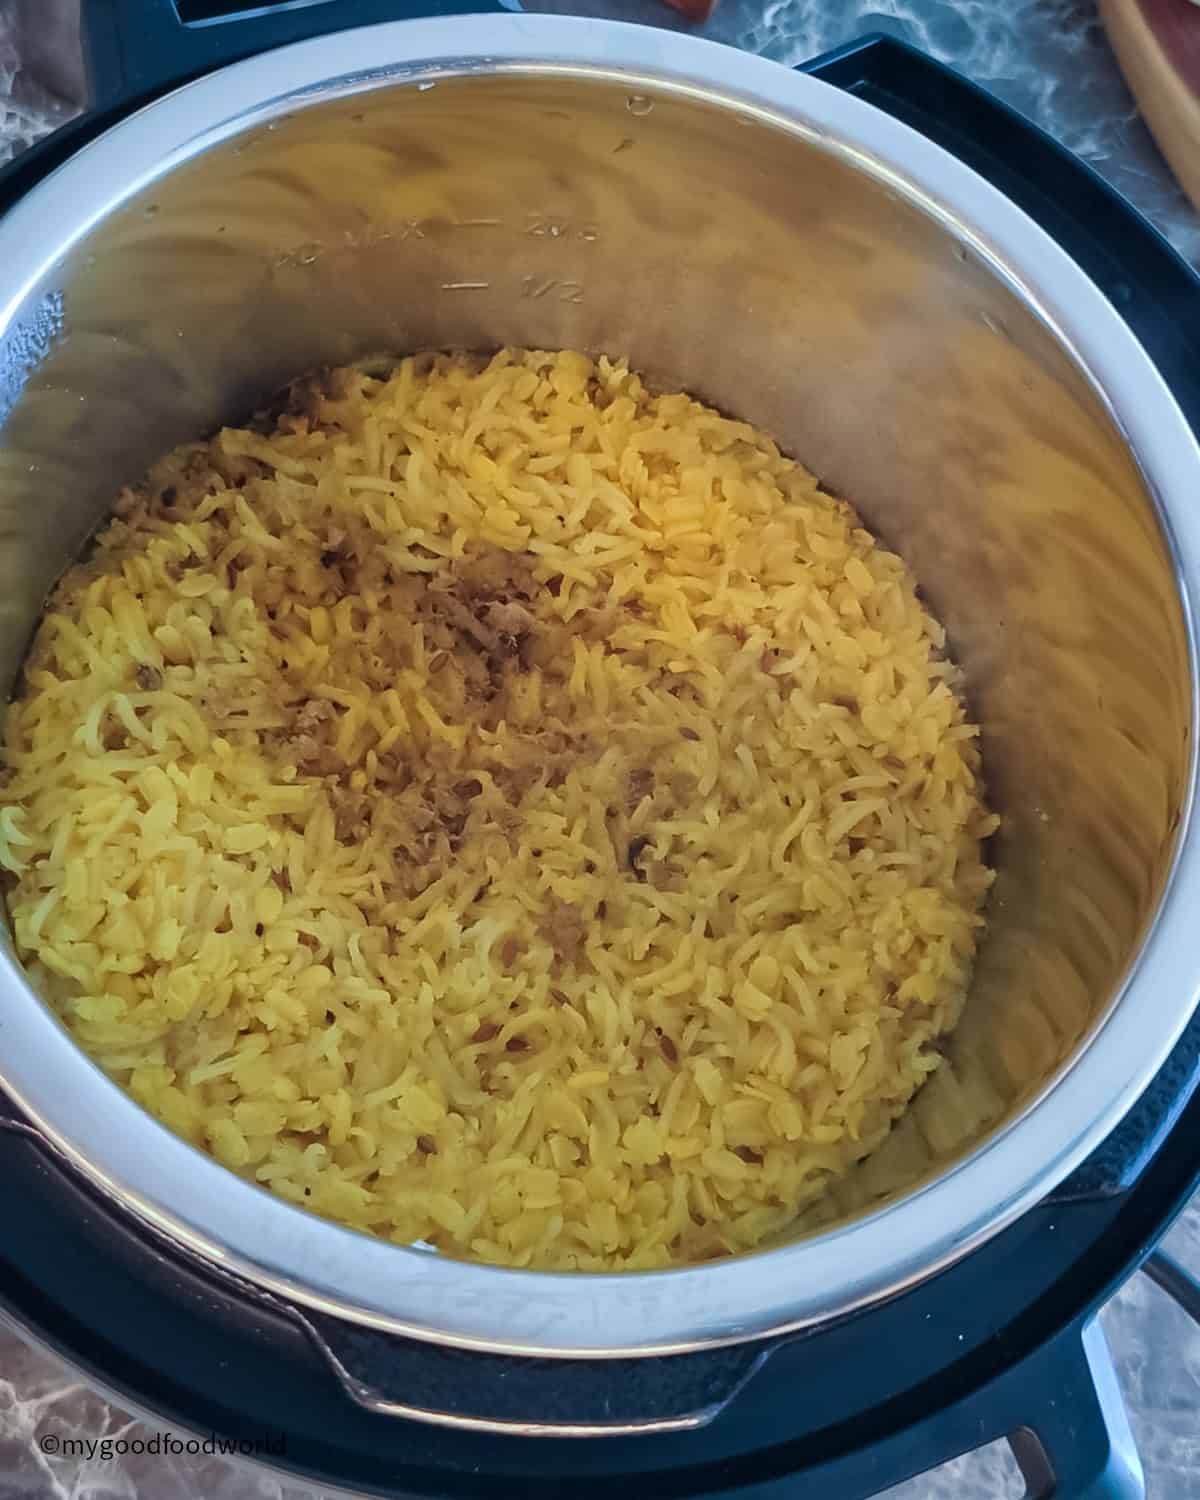
Step 3: Cook the kitchari
Close the lid of the Instant Pot and cook on high pressure for 3 minutes. Allow the pressure to release naturally for 10 minutes, then manually release the remaining pressure. When the pressure is released, carefully open the lid.
Hint: The water should be fully absorbed, and the kitchari should be perfectly soft.
Step 4: Adjust the consistency
Turn sauté mode back on for a couple of minutes. Add more hot water to bring the kitchari to your preferred consistency, and add more ghee. Mix well and turn the Instant Pot off.
Padma's top tip: Mung dal kitchari tastes best when it has a porridge-like consistency.
Garnish, if you like, with more ghee and ground cumin. Serve hot.
Recipe Notes
Ratio of rice to lentils: I usually go with a 1:1 ratio of rice to lentils. It gives the kitchari a good balance of carbs and protein. If you're looking to switch things up, try using 1 part rice to ½ part lentils. Just remember that you'll need a little less water if you go with that ratio.
Type of rice: I like using Basmati rice because it has a lovely aroma and cooks fast. That said, you can use any kind of rice you prefer-long grain, short grain, or medium. Just keep in mind that the cooking time might change depending on the type you use.
Can I use brown Basmati rice for kitchari?
Yes, you can use brown Basmati rice for kitchari, but keep in mind that it takes longer to cook than white Basmati. If you're using brown rice, you'll need to increase the cooking time and add more water to get the right consistency. Soaking the rice for at least 30 minutes beforehand can help it cook more evenly.
Water quantity: I like my kitchari soft and porridge-like. If you prefer it thicker, you can stick with the initial 3 cups of water or adjust the amount to get the consistency you like.
Using a pressure cooker: You can make this recipe in a stovetop pressure cooker, too. Just follow the same instructions.

Easy Variations
My kitchari recipe is a simple base that you can jazz up however you like, depending on the vibe of your day.
- Spicy: Crush some green chili along with the ginger and black pepper for extra heat, or stir in a teaspoon of garam masala toward the end of cooking.
- Deluxe: Add vegetables like potato, carrot, green beans, spinach, or peas. Cut them into evenly sized cubes and add them along with the rice and lentils. You don't need to add extra water, but you might need a little more salt.
- Make it vegan: Ghee is an essential part of traditional Ayurvedic kitchari, but you can easily swap it with coconut oil or any other plant-based oil you prefer.
- Add onion and garlic: This is a naturally allium-free recipe. You can, if you like, add onions and garlic. Chop them finely and sauté them along with the spices.
- Use whole mung beans instead: You can make this kitchari with whole mung beans instead of split lentils. Just soak the beans for at least 5 hours. Start with 4 cups of water instead of 3. The rest of the process stays the same.
If you want to see how mung beans measure up to lentils, check out my mung beans vs lentils post.
Storage, Reheating, And Serving
Kitchari tastes best when it's fresh and piping hot. That said, if you have any leftovers, you can store them in the fridge or freeze them for later.
How long can I store cooked kitchari? You can store cooked kitchari in the fridge for up to 3 days or in the freezer for up to 2 months.
Reheating: Kitchari tends to thicken and clump as it cools, thanks to the moong dal. To bring it back to its best texture after storing, thaw it first if frozen, then place it in a heavy-bottomed pan. Add a splash of water and warm it gently, stirring as you go, until it loosens into a thick, soup-like consistency. It should be soft and spoonable, like my lentil carrot soup.
How to serve this kitchari
My simple kitchari tastes great just as it is. Serve it fresh and piping hot. If you like, you can add a little more ghee and a sprinkle of ground cumin on top.
When you're enjoying this kitchari outside of a cleanse routine, try pairing it with lime or lemon wedges. If you're okay with dairy and a bit of heat, I recommend serving it with cucumber raita and these quick pickled carrots for a spicy kick.
FAQs
A kitchari cleanse recipe is a gentle way to reset your system with warm, nourishing meals made from split mung lentils, rice, and gut-friendly spices. In Ayurveda, this one pot dish is used during detoxes because it's easy to digest, balances the doshas, and gives your digestive system a break without leaving you feeling hungry or deprived. My kitchari cleanse recipe comes together in the Instant Pot with minimal prep, making it perfect for busy days when you still want to eat clean and feel grounded.
Kitchari is traditionally made as a gentle, nourishing meal that supports digestion and gives your system a break. Rooted in Ayurvedic cooking, its purpose is to balance the body, especially during times of stress, illness, or seasonal change. It's often used during cleanses or detox routines because it's easy to digest and made with simple ingredients like rice, moong dal, and warming spices. Kitchari is naturally gluten-free and helps restore gut health while keeping you full and satisfied.
Yes, you can use red lentils instead of moong dal to make a variation of kitchari. While this traditional Ayurvedic dish is typically made with moong dal or whole mung beans, red lentils are a great option for everyday meals when you're not doing a cleanse. They cook quickly, have a soft, creamy texture, and give the kitchari a slightly different flavor.
Yes, kitchari can be a gentle and nourishing meal for babies and toddlers. It's easy to digest, soft, and packed with nutrients from rice and lentils. For little ones, you can skip the spices or keep them very mild, and mash or blend the kitchari for a smoother consistency. If your baby is just starting solids, check with your pediatrician first, especially when introducing lentils. For toddlers, you can gradually add soft vegetables and a little ghee for extra flavor and healthy fats.
Yes, it's generally okay to eat kitchari every day, especially for a short period like during an Ayurvedic cleanse. Kitchari is easy on the stomach, packed with plant-based protein, and full of fiber. Since it's made with rice and mung dal, it offers a balanced meal that's both comforting and nourishing. If you plan to eat it daily for more than a few days, try switching up the vegetables or spices to keep things interesting and ensure you're getting a wider range of nutrients.
You might also like
Made this recipe? I'd love to know what you think! Leave a ★★★★★ rating and a review below-it motivates me to create more great content for you. You can also connect with me on Facebook and Instagram. And don't forget to subscribe to my newsletter, where I share free recipes, tips, and more!
📖 Recipe
Kitchari Recipe (Instant Pot, Ayurvedic)
Save This Recipe
Enter your email & I'll send it to your inbox.
By submitting this form, you consent to receive emails from MyGoodFoodWorld
Ingredients
Equipment
Instructions
- Switch the Instant Pot to Sauté mode and roast the rice and lentils until they emit a lovely aroma.½ cup mung (moong) dal, ½ cup rice
- Once they're roasted, tip them into a bowl and rinse with 2 to 3 changes of water, or until the water runs clear. Drain and set aside.
- Make a coarse paste of the ginger and black pepper.½ teaspoon black peppercorns, 1 inch piece fresh ginger
- Now, back to the IP: set it to Sauté mode again. Add ½ tablespoon of the ghee, along with the cumin and hing. When the cumin begins to sizzle, add the ginger-black pepper paste and fry for a minute.1 and ½ tablespoons ghee, ½ teaspoon cumin seeds, ⅛ teaspoon powdered asafoetida (hing)
- Next, add the rice and lentils. Stir well so the ghee and spices coat them evenly. Pour in 3 cups of water, then add the turmeric, salt, and cumin powder. Mix well and taste to check the salt-add more if needed.4 and ½ cups hot water, ¼ teaspoon turmeric powder, ½ teaspoon ground cumin, 1 teaspoon salt
- Secure the lid and set the Instant Pot to Pressure Cook (High) for 3 minutes. Once the cooking time is up, let the pressure release naturally for 10 minutes, then manually release any remaining pressure.
- When all the pressure is released, carefully open the lid and stir the kitchari. The water should be fully absorbed, and the kitchari should be perfectly soft.
- Turn Sauté mode back on for a couple of minutes. Add the remaining hot water and ghee, then mix well and turn the IP off.
- Garnish if you'd like-or just enjoy it as it is. Kitchari tastes best when served hot.bhuna jeera (roasted and powdered cumin), crushed black pepper, ghee
Nutrition
The nutritional information is calculated using an online calculator and is based on available ingredients and preparation. It should not be considered a substitute for a professional nutritionists' advice. Changing the quantities and cooking technique will alter the nutritional calculations.
Video
Notes
- Ratio of rice to lentils: I prefer using an equal ratio of rice to lentils (1:1), as it gives the kitchari a nice balance of carbs and protein. If you're in the mood to experiment, try a 1:½ ratio-that is, 1 portion of rice to ½ portion of lentils. If you go that route, just keep in mind that you'll need less water.
- Type of rice: I like to use Basmati rice for this-it has a lovely fragrance and cooks quickly. You can use any type of rice you prefer: long, short, or medium grain. Just keep in mind that the cooking time will vary depending on the rice you use. The timing in this recipe is based on Basmati.
- Make it vegan: Ghee is an essential part of this Ayurvedic kitchari recipe, but if you'd like to make it vegan, go ahead and swap it with any plant-based oil you like.
- Water quantity: I like my kitchari to have a porridge-like consistency. If you prefer it thicker, you can stop with the initial 3 cups of water or just add as much as you like to get the texture you prefer.
- In a pressure cooker: You can also make this recipe in a stovetop pressure cooker. The instructions stay the same.
Alternative quantities provided in the recipe card are for 1x only.
Our content aims to be informative and educational, but it should not replace professional medical advice. Since manufacturing processes can vary and cross-contamination is possible, it's essential to verify product labels and allergen information. Make sure all ingredients align with your specific allergies. As readers, you bear the responsibility for ensuring allergen safety when buying or consuming foods.


Sheetal says
I have been looking for an authentic kitchari recipe. Thank you so much for this!