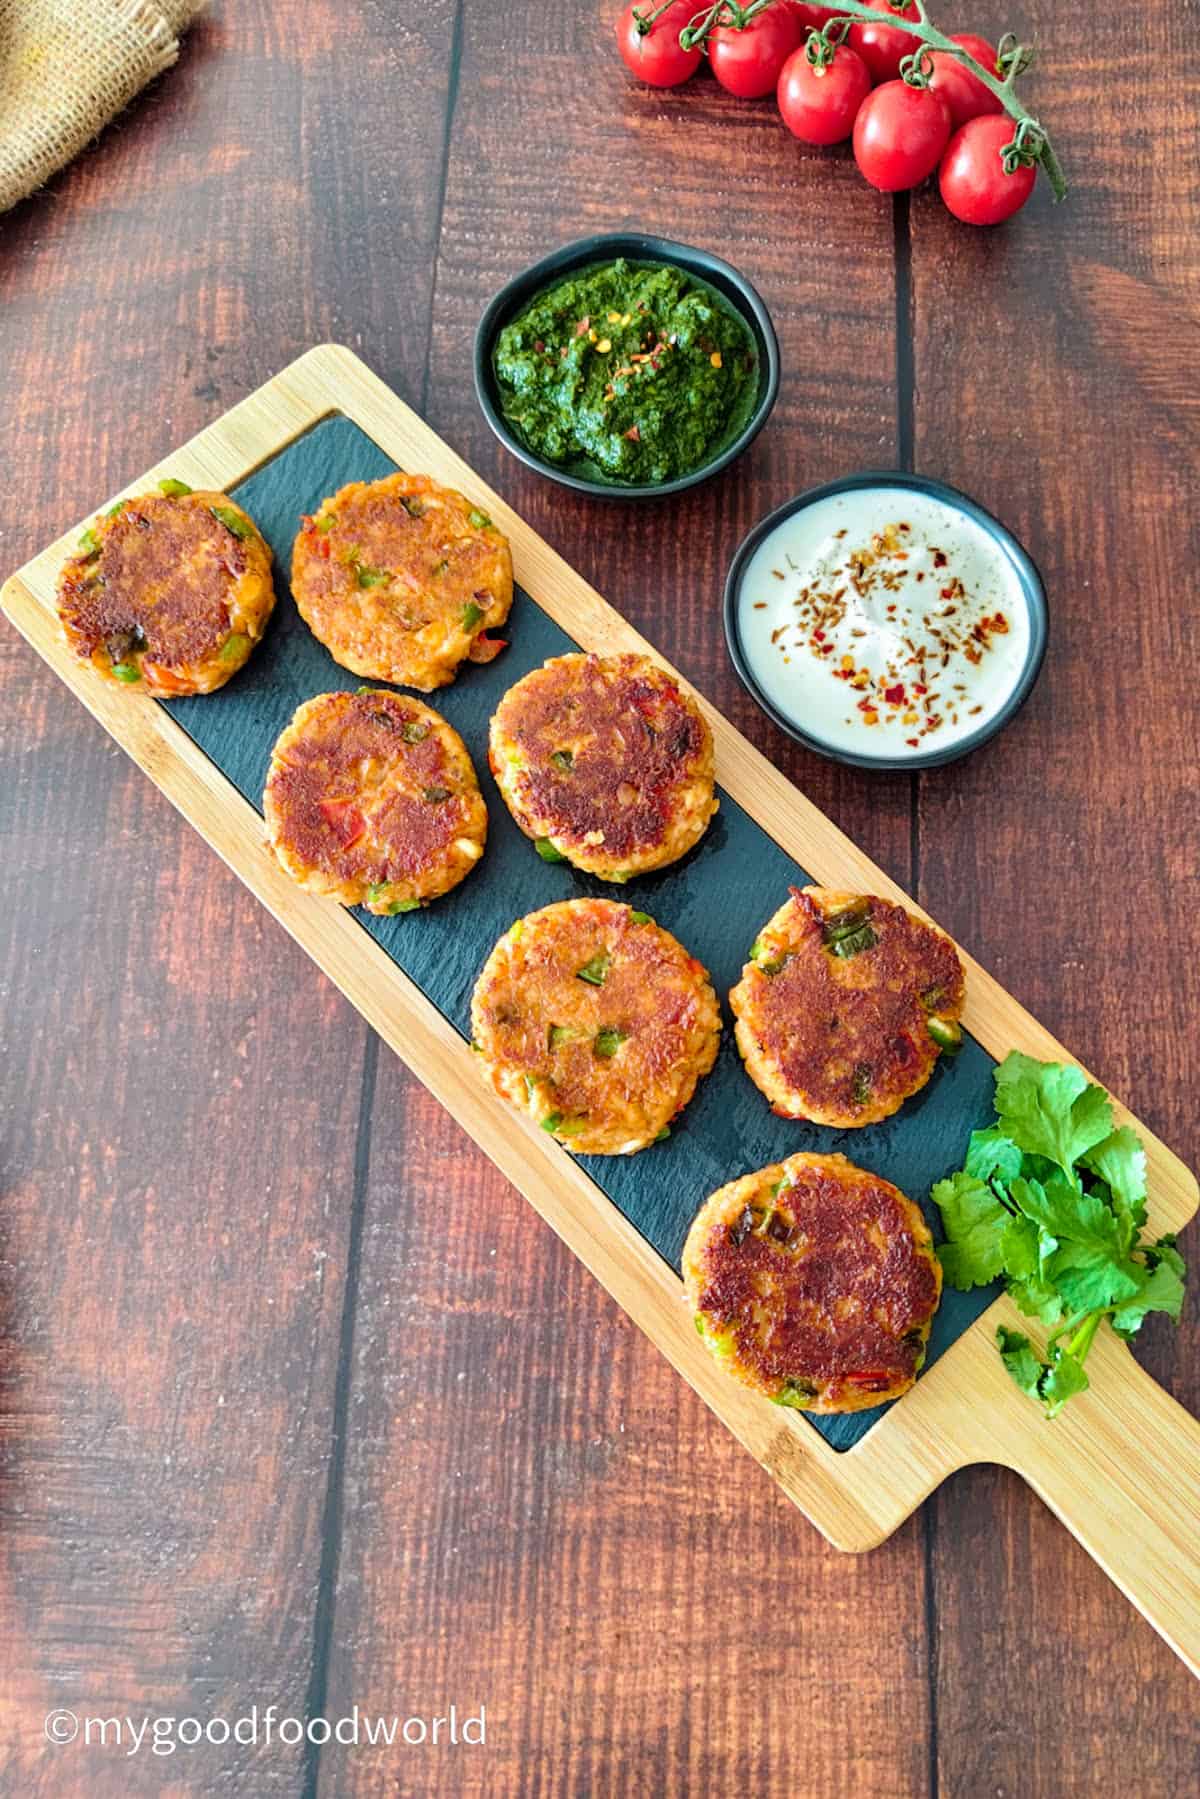
Walnut paneer cutlet (also called paneer tikki) is a small, pan-fried patty made with paneer, potato, walnuts, and bell peppers. It's gluten-free, ready in about 30 minutes, and just right for a party platter or an easy evening snack. Unlike most paneer cutlets, this one has no breadcrumb coating and no onion or garlic, and it gets a smoky flavor from smoked paprika or, if you're feeling adventurous, a little live charcoal.
Save This Recipe
Enter your email & I'll send it to your inbox.
By submitting this form, you consent to receive emails from MyGoodFoodWorld
Makes: about 15 small cutlets (serves 5, 3 each) | Time: 30 minutes, plus optional walnut soaking | Made without onion or garlic | Gluten-free | Contains tree nuts and dairy.
If you have tried my paneer bhurji without onion garlic, you will love these paneer cutlets. I follow the same principles here as well: simple spices, an easy recipe, and maximum flavor.
This recipe is a favorite at home for a few reasons:
- It's quick and easy to make.
- It's filling, with 10g of protein per serving. See the nutrition chart below.
- You can make the cutlets ahead and keep them in the fridge for up to 3 days.
- It's versatile, a snack one day and a party starter the next.
For a visual guide, check out the video and step-by-step photos. And if you're looking for more dishes made without onion and garlic, I have a whole collection of allium-free recipes for you to explore.
This post includes helpful tips, but if you're in a hurry, use the "Jump to Recipe" or section links to skip ahead.
Jump to:
What Is a Paneer Cutlet (and Is It the Same as Paneer Tikki)?
A paneer cutlet is a vegetarian, pan-fried patty made with paneer (fresh Indian cheese), potato, and spices. Paneer tikki is the same dish. The two names are used interchangeably, so you'll see both on recipes everywhere.
Cutlet sounds fancier than it is. It's a patty shaped from a spiced mixture and cooked until golden. (No special skills required, I promise.)
I use both names in this post. Whichever one you call them, the recipe is the same.
What is paneer? Paneer is a fresh, mild Indian cheese made by curdling hot milk with an acid, like lemon juice, and pressing it into a block. It's soft and milky, and it holds its shape when heated instead of melting into a puddle. That's exactly why it works so well in a patty. You'll find paneer in Indian grocery stores, usually in the refrigerated section (here's a handy guide to what paneer is and where to buy it).
Larger supermarkets often carry it too, near the specialty cheeses or in the international aisle. I use full-fat paneer here for the best taste and texture.
What Makes These Walnut Paneer Cutlets Different?
Most paneer cutlets lean on onion, garlic, and a breadcrumb crust. Mine take a different route.
- No coating needed. Boiled potato and a little cornstarch hold everything together. They brown to a lovely golden crust in the pan.
- Walnuts for texture. Finely chopped walnuts add a gentle crunch against the soft paneer. I soak mine and leave the skins on, which adds to the texture too. (Raw walnuts are fine if you're in a rush.)
- A smoky flavor. Smoked paprika does most of the work. For extra drama, you can smoke the mixture with a piece of live charcoal. It's optional, but it's a fun trick.
- Simple spices, big flavor. There's no onion or garlic here, and you won't miss them.
- Snack-board size. I shape them small, like little coins, so they're easy to pick up, dunk, and pass around. The recipe makes about 15.
- Two ways to cook. Pan-fry them on the stovetop, or grill (broil) them in the oven.
Ingredient Notes
You need just a handful of ingredients for these walnut paneer cutlets. Exact amounts are in the recipe card below. Here's what each one does and why I chose it.
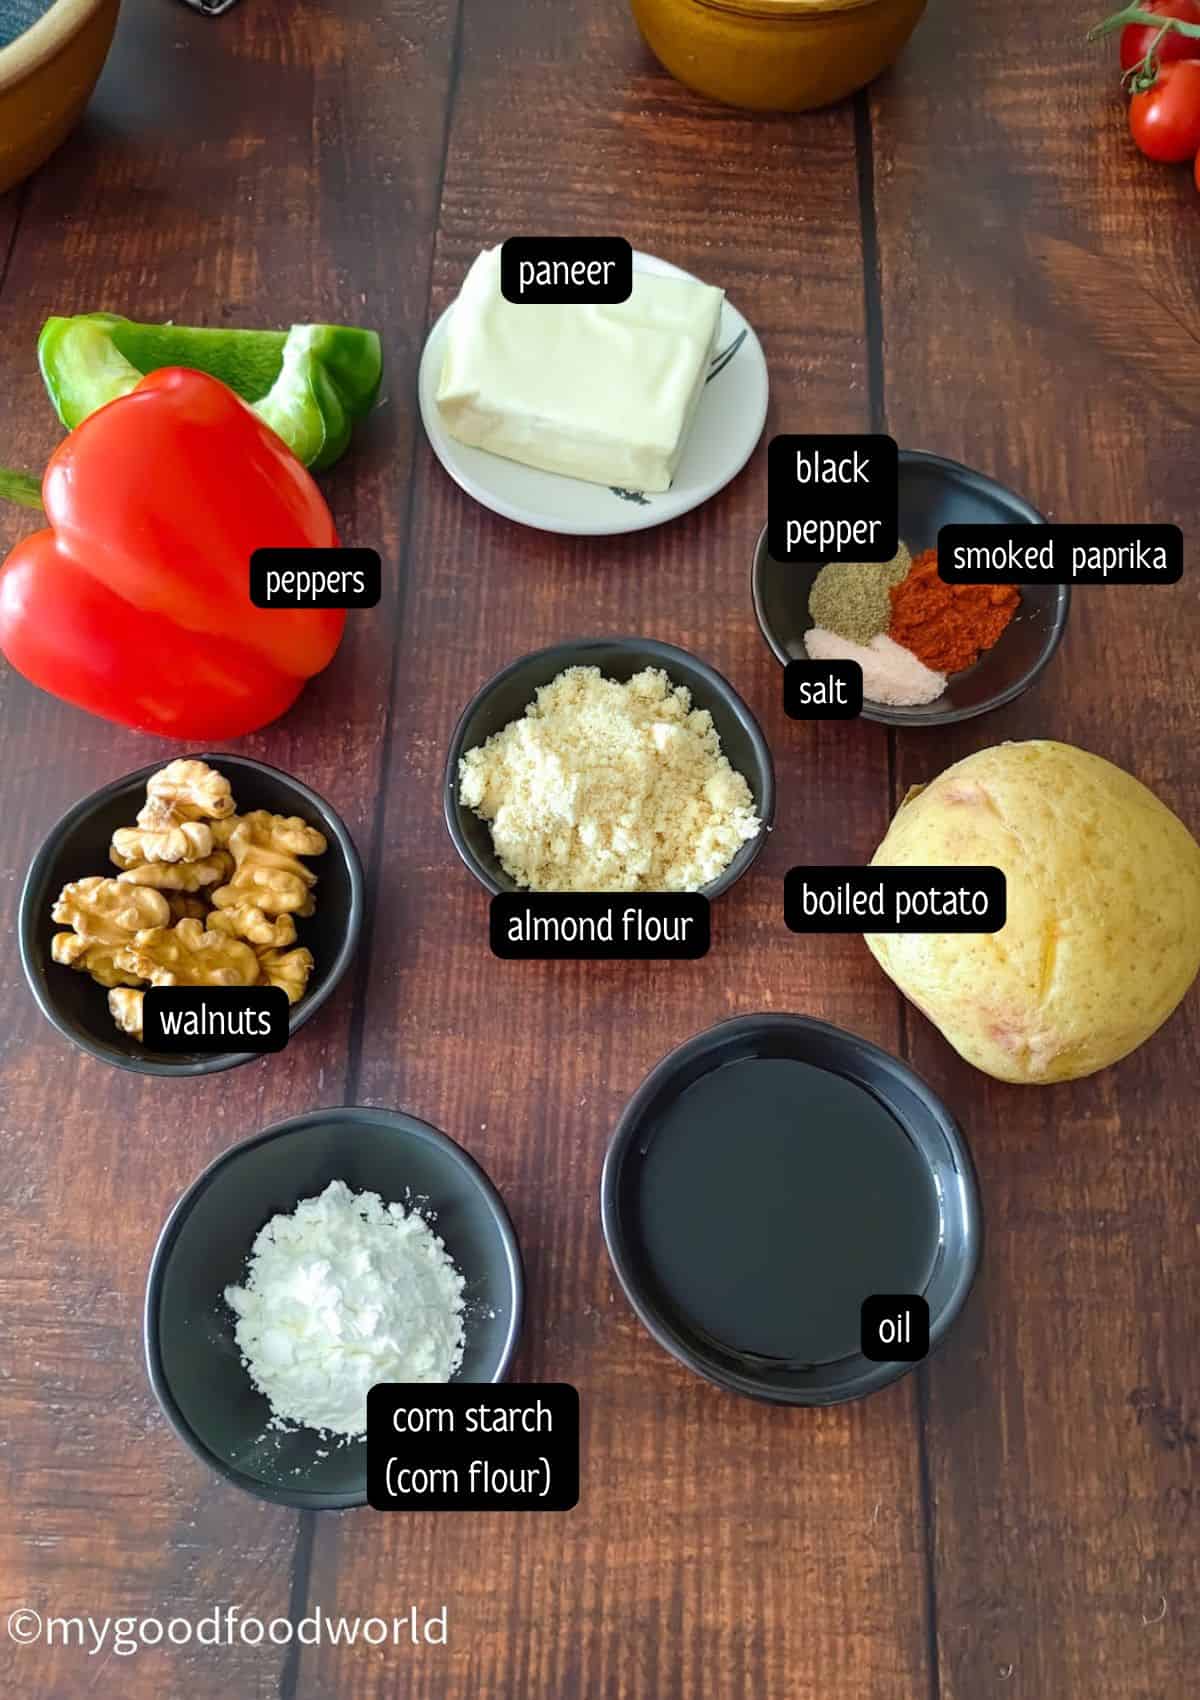
Paneer: For the best taste and texture, I use full-fat paneer. I grate it, and it mixes evenly with the potato.
Potato: One large boiled potato forms the base of the cutlets and holds everything together. I use an all-purpose potato, such as Yukon Gold. Boil it ahead, let it cool, then peel and grate it. Very floury potatoes can turn crumbly, and the cutlets won't hold their shape as well.
Walnuts: Finely chopped walnuts add a gentle crunch against the soft paneer. I soak mine for 24 hours and chop them with the skins on, which adds to the texture. If you're in a rush, raw walnuts are fine too.
Almond flour: also called ground almonds, adds protein and a little nutty flavor. I use the blanched version. For more ideas, see my vegetarian high-protein recipes.
Cornstarch: Cornstarch is what holds the cutlets together. The bell pepper and walnuts need extra binding, and the potato alone isn't enough. In the UK and India, it's called corn flour. In the US, 'corn flour' means finely ground cornmeal, which won't do the same job, so check the label.
Bell peppers: I use both green and red for a pop of color, and they add a little sweetness and crunch. Use whatever you have on hand.
Smoked paprika: This gives the cutlets their smoky flavor. It works on its own, even if you skip the charcoal step.
Oil or Ghee: I pan-fry the cutlets in oil. Ghee gives a richer, nuttier flavor, if you'd like to use it.
For the smoke (optional): If you want to try the live charcoal trick, you'll need a small piece of natural lump charcoal, a heat-proof bowl, and tongs. I walk through the whole method, including the safety steps, in the next section.
A quick allergen note
These cutlets contain tree nuts (walnuts and almond flour) and dairy (paneer, plus ghee if you use it). They're made with gluten-free ingredients, but check the labels on your cornstarch and spices to be sure.
How to Get That Smoky Flavor
There are two ways to get smoky flavor in these cutlets, and one of them takes no extra effort. Smoked paprika alone gives you a mild, warm smokiness. The live charcoal step gives a more intense flavor, and it's optional.
Smoked Paprika (the easy way)
Smoked paprika goes straight into the mixture with the other spices. That's it. If you skip the charcoal, you still get a gentle smoky flavor in every bite.
Live Charcoal (the dhungar method)
This is an old Indian trick for adding a smoky, tandoor-style flavor to food without a tandoor, as I do for my smoked eggplant curry. It sounds dramatic, but it's easy once you've done it once.
- Using tongs, hold a piece of natural lump charcoal over a gas flame until it glows red and is covered in gray ash. Place it in a small heat-proof bowl.
- Make a well in the center of the cutlet mixture and set the bowl in it.
- Add a couple of drops of oil or melted ghee to the charcoal. The hot charcoal will start to smoke.
- Cover the mixture with a lid as soon as you see smoke rising.
- Let it smoke for 5 minutes for a mild smoky flavor, or longer for a stronger one.
- Remove the bowl with tongs, then stir the mixture once before shaping.
Let the charcoal cool completely before you throw it away.
Safety first: Use a heat-proof bowl and tongs, and do this in a well-ventilated area, because burning charcoal releases carbon monoxide. Don't use charcoal briquettes or lighter fluid. Never leave burning charcoal unattended.
How to Make Paneer Cutlets (Step by Step)
These come together in a few simple stages. Exact quantities are in the recipe card below.
Step 1: Prep the ingredients
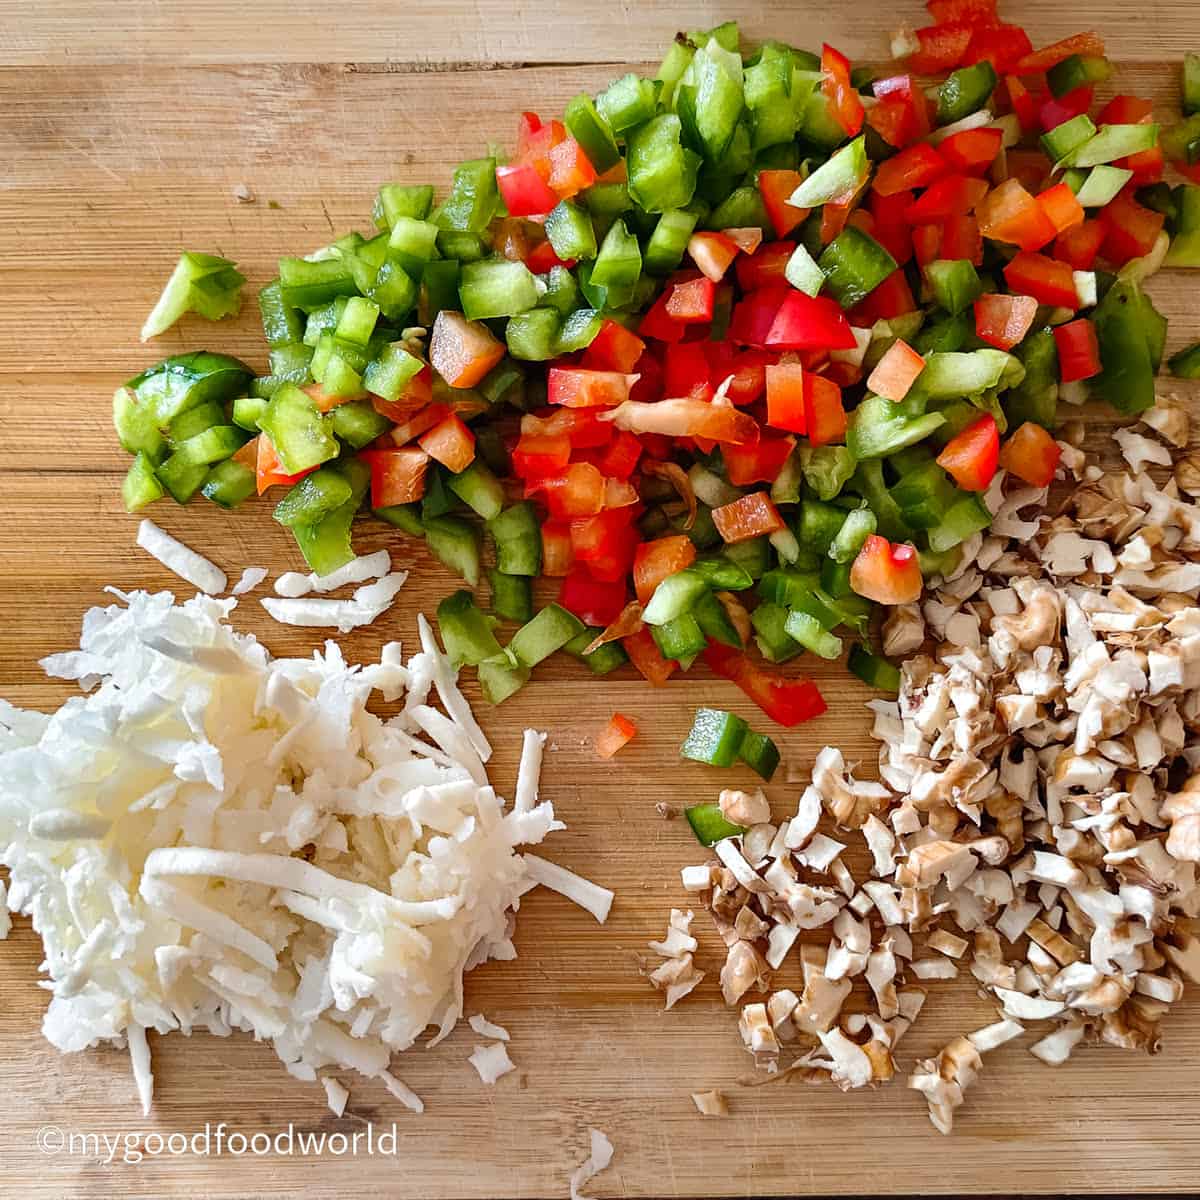
Grate the boiled, cooled potato and the paneer. A box grater works well.
Chop the walnuts finely, and cut the bell pepper into small cubes. Keep everything in one place, because the next step moves fast.
Step 2: Make the cutlet mixture
Add the grated paneer and potato to a large bowl. Add the walnuts, bell pepper, almond flour, cornstarch, smoked paprika, salt, and black pepper.
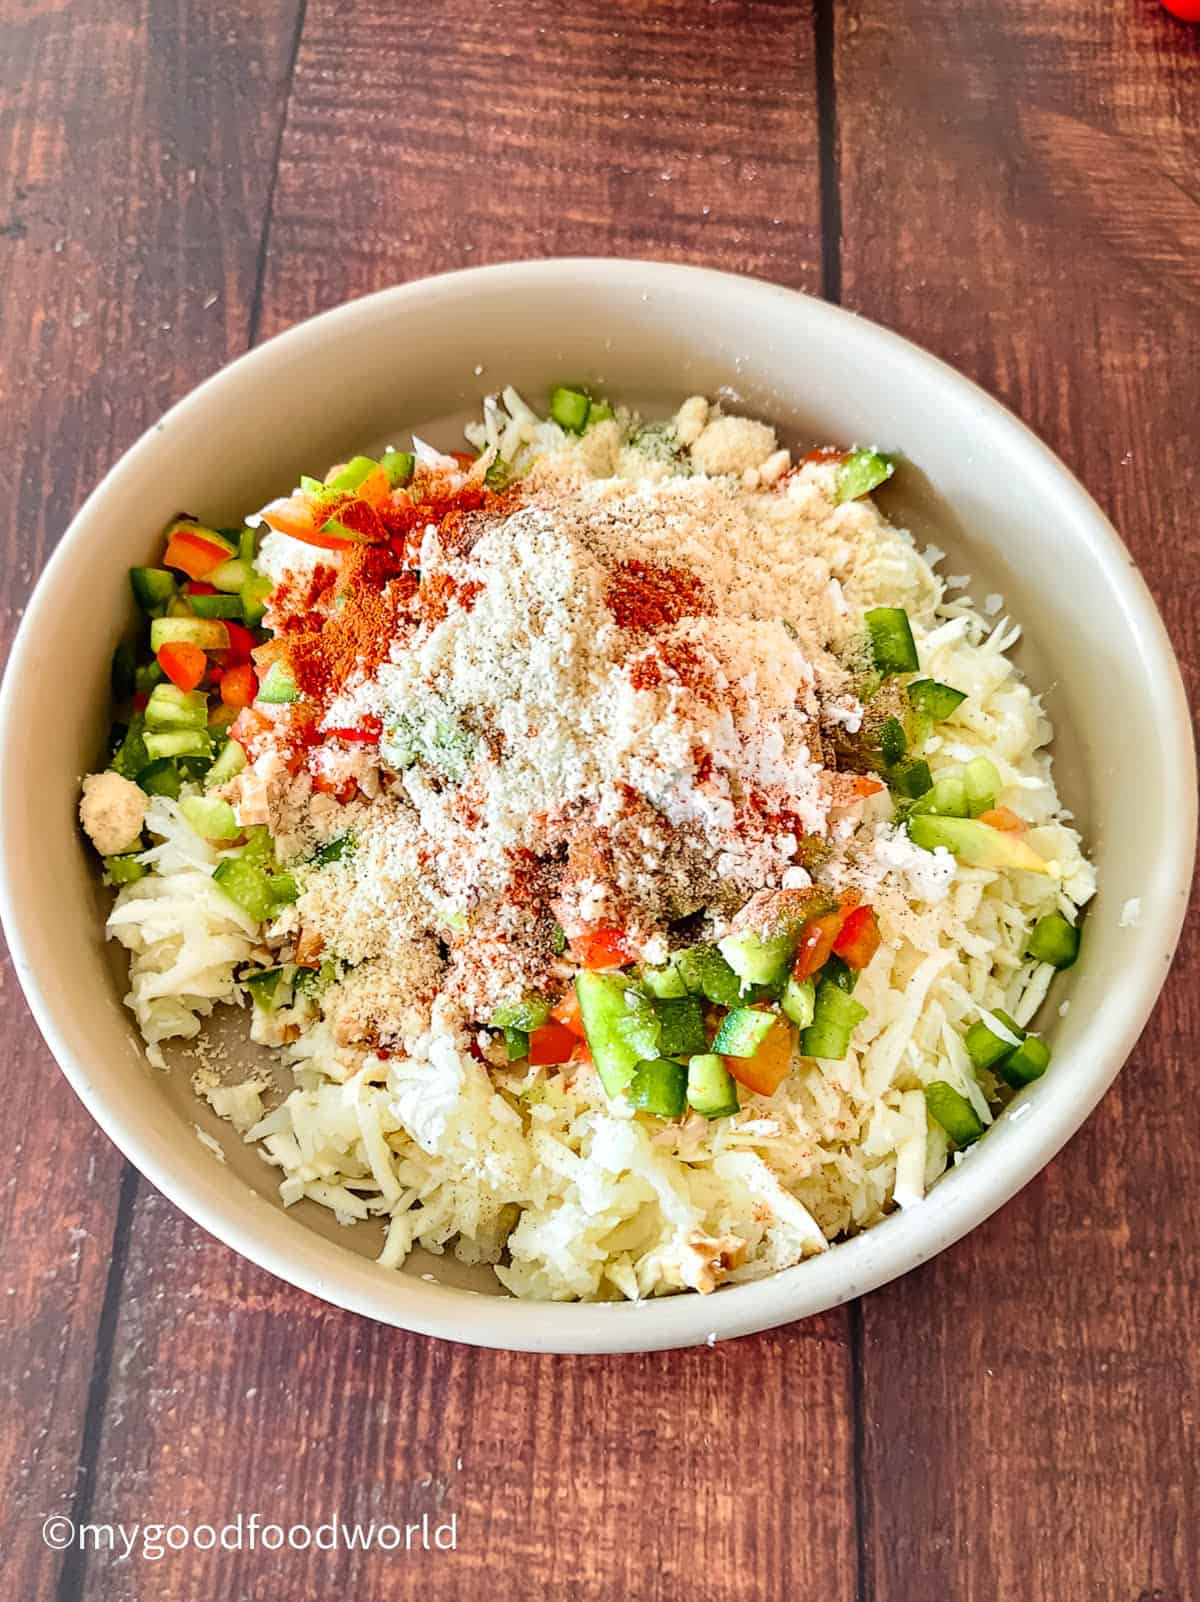
Mix well, until the mixture holds together when you press it.
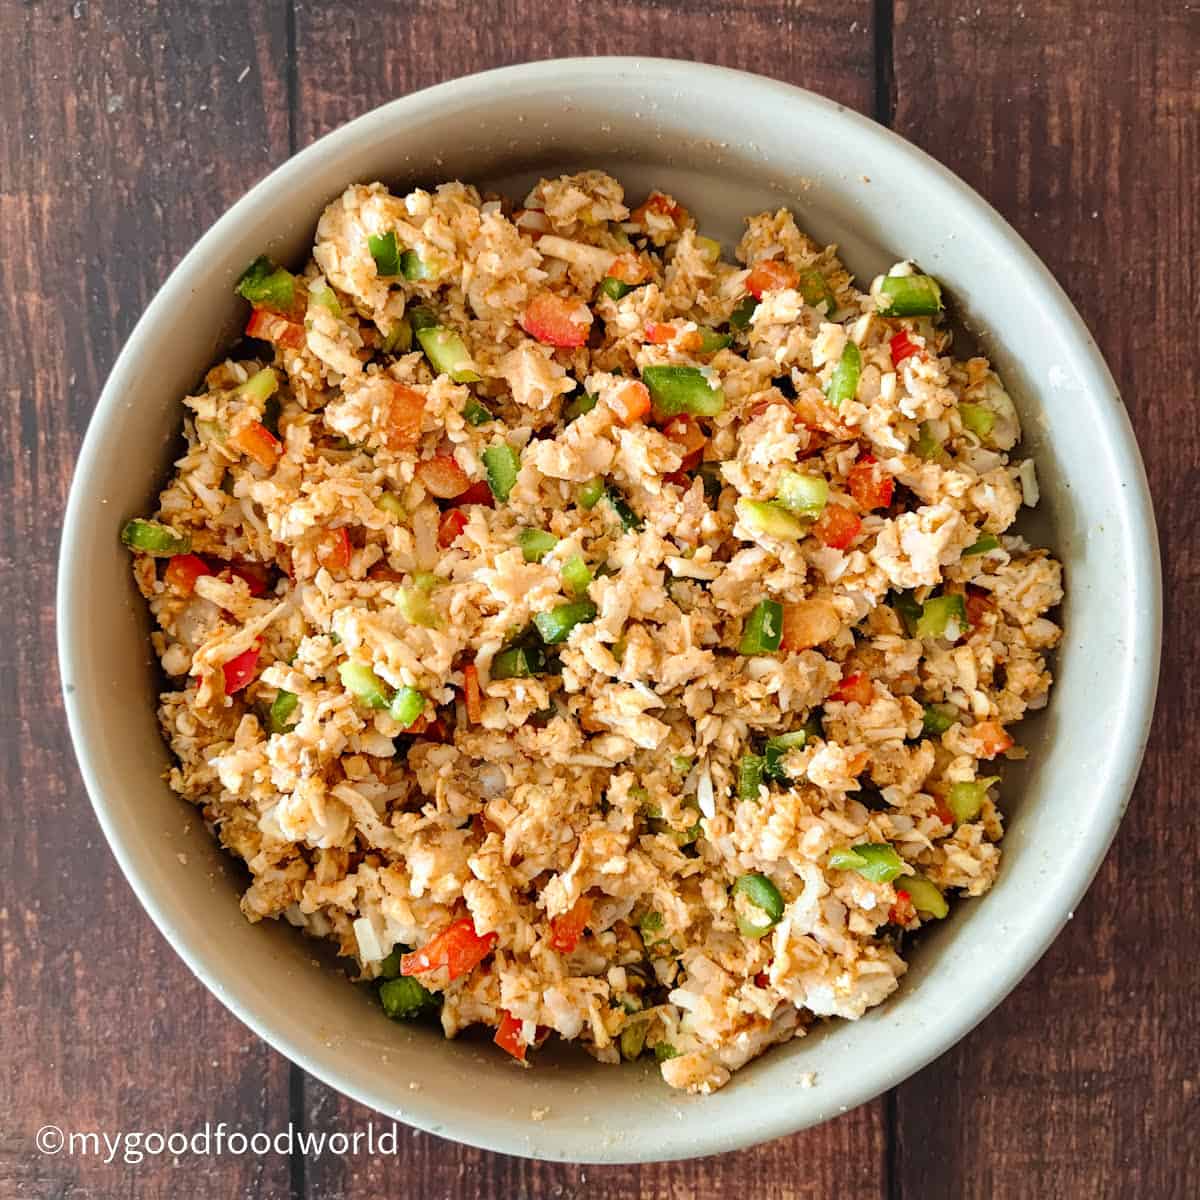
Step 3: Infuse the smoke (optional)
This is the live charcoal step from the section above. If you're doing it, smoke the mixture for 5 minutes (or longer, for a stronger flavor), then stir once before shaping.
If you're skipping it, go straight to shaping. The smoked paprika is already doing the work.
Step 4: Shape the cutlets
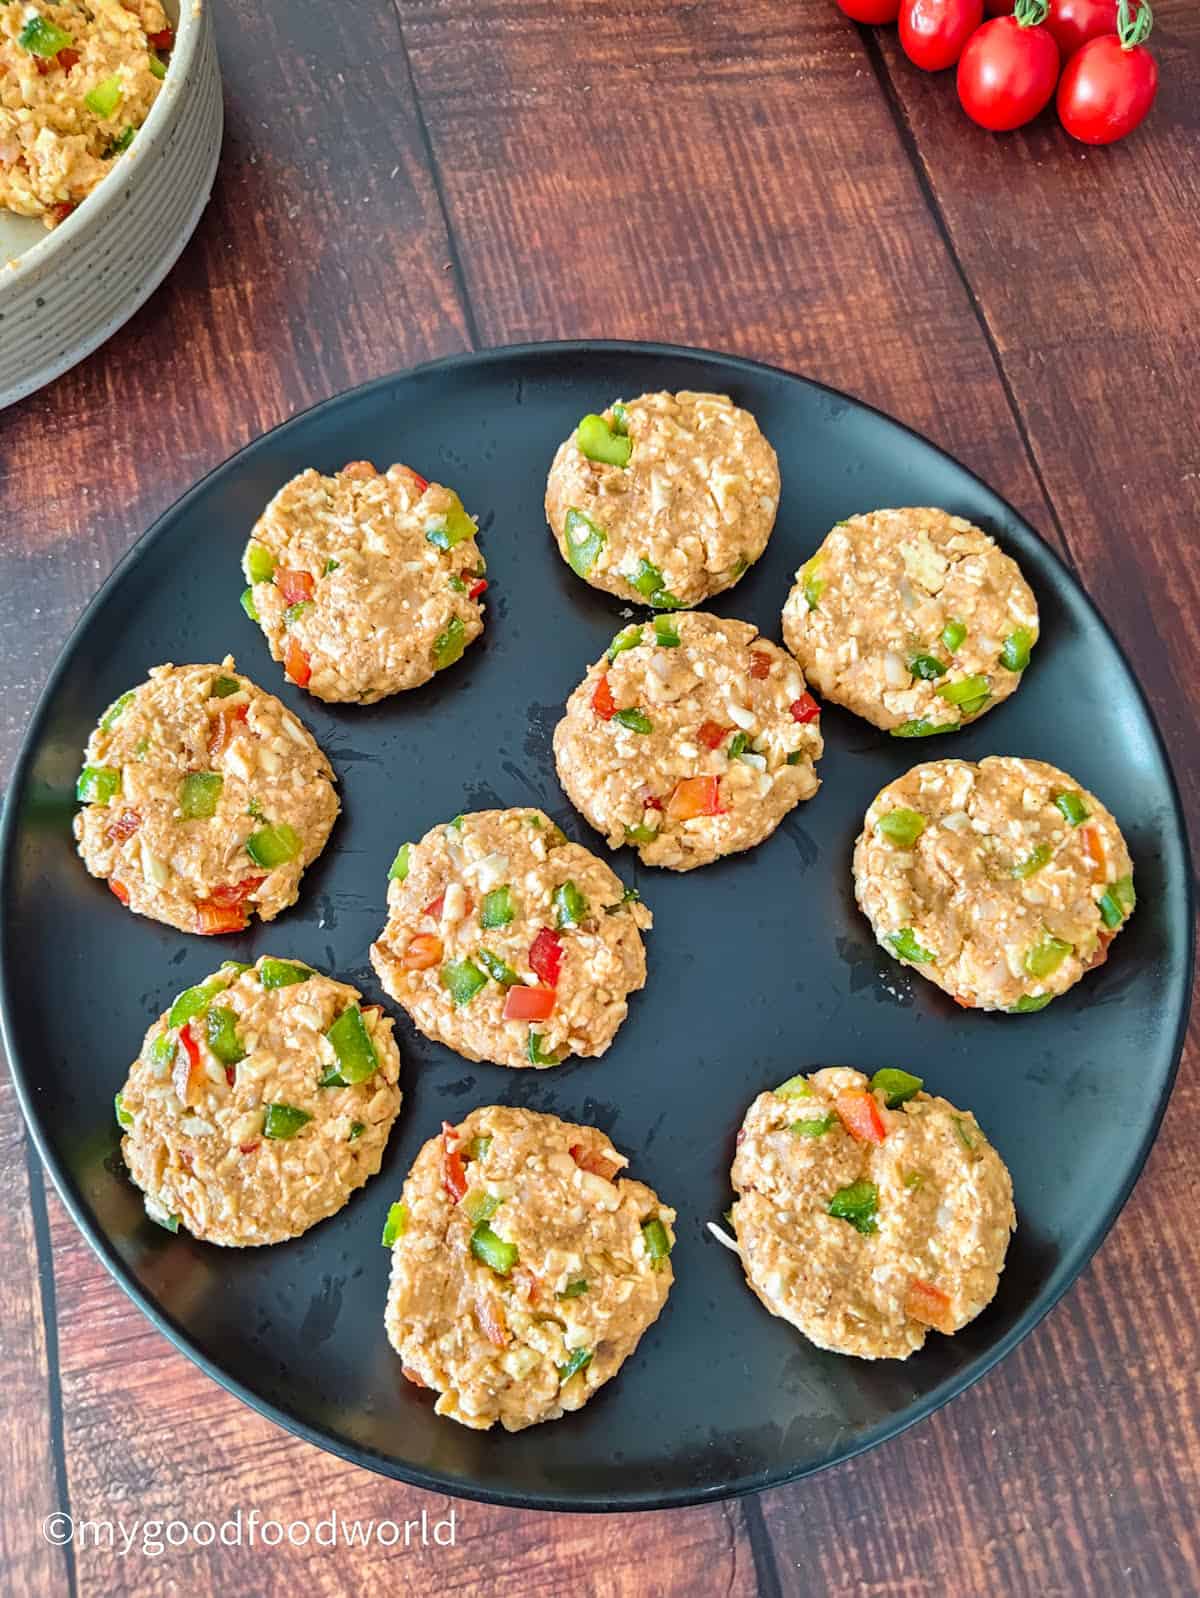
Take a golf ball-sized portion of the mixture and roll it into a ball. Place it on your palm and press gently to flatten it into a small round. Repeat with the rest of the mixture. You'll get about 15 cutlets.
Step 5: Pan-fry the cutlets
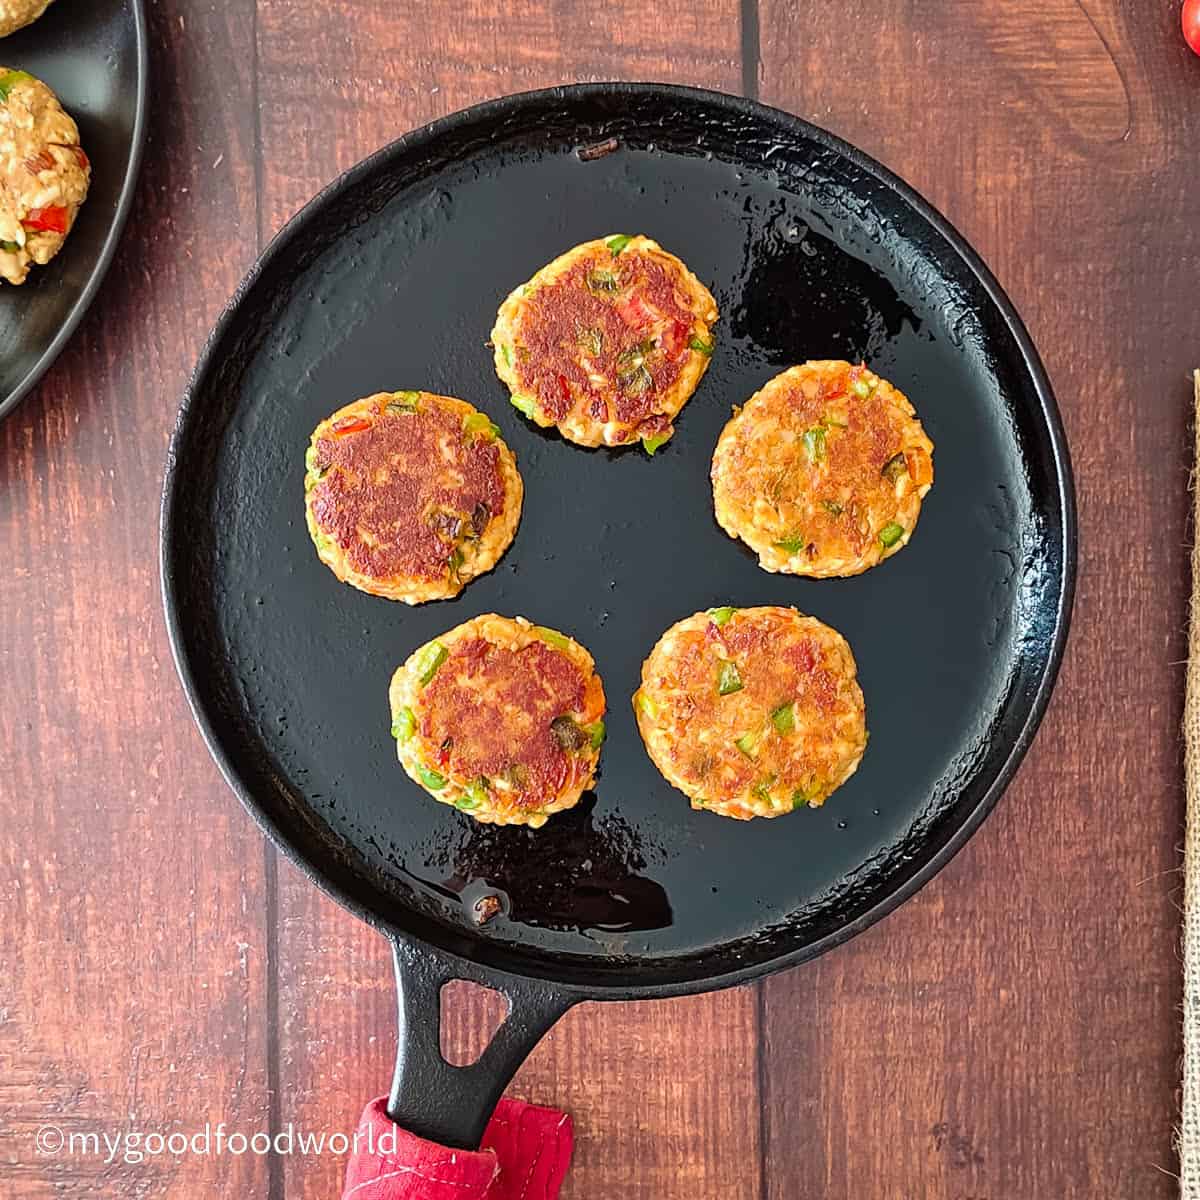
Heat a little oil in a skillet over medium-high heat. Add the cutlets and cook for 2 to 3 minutes, until golden underneath.
Flip them gently with a thin spatula (they're soft, so be kind) and cook the other side for another 2 to 3 minutes, until golden. Add a few more drops of oil if the pan looks dry.
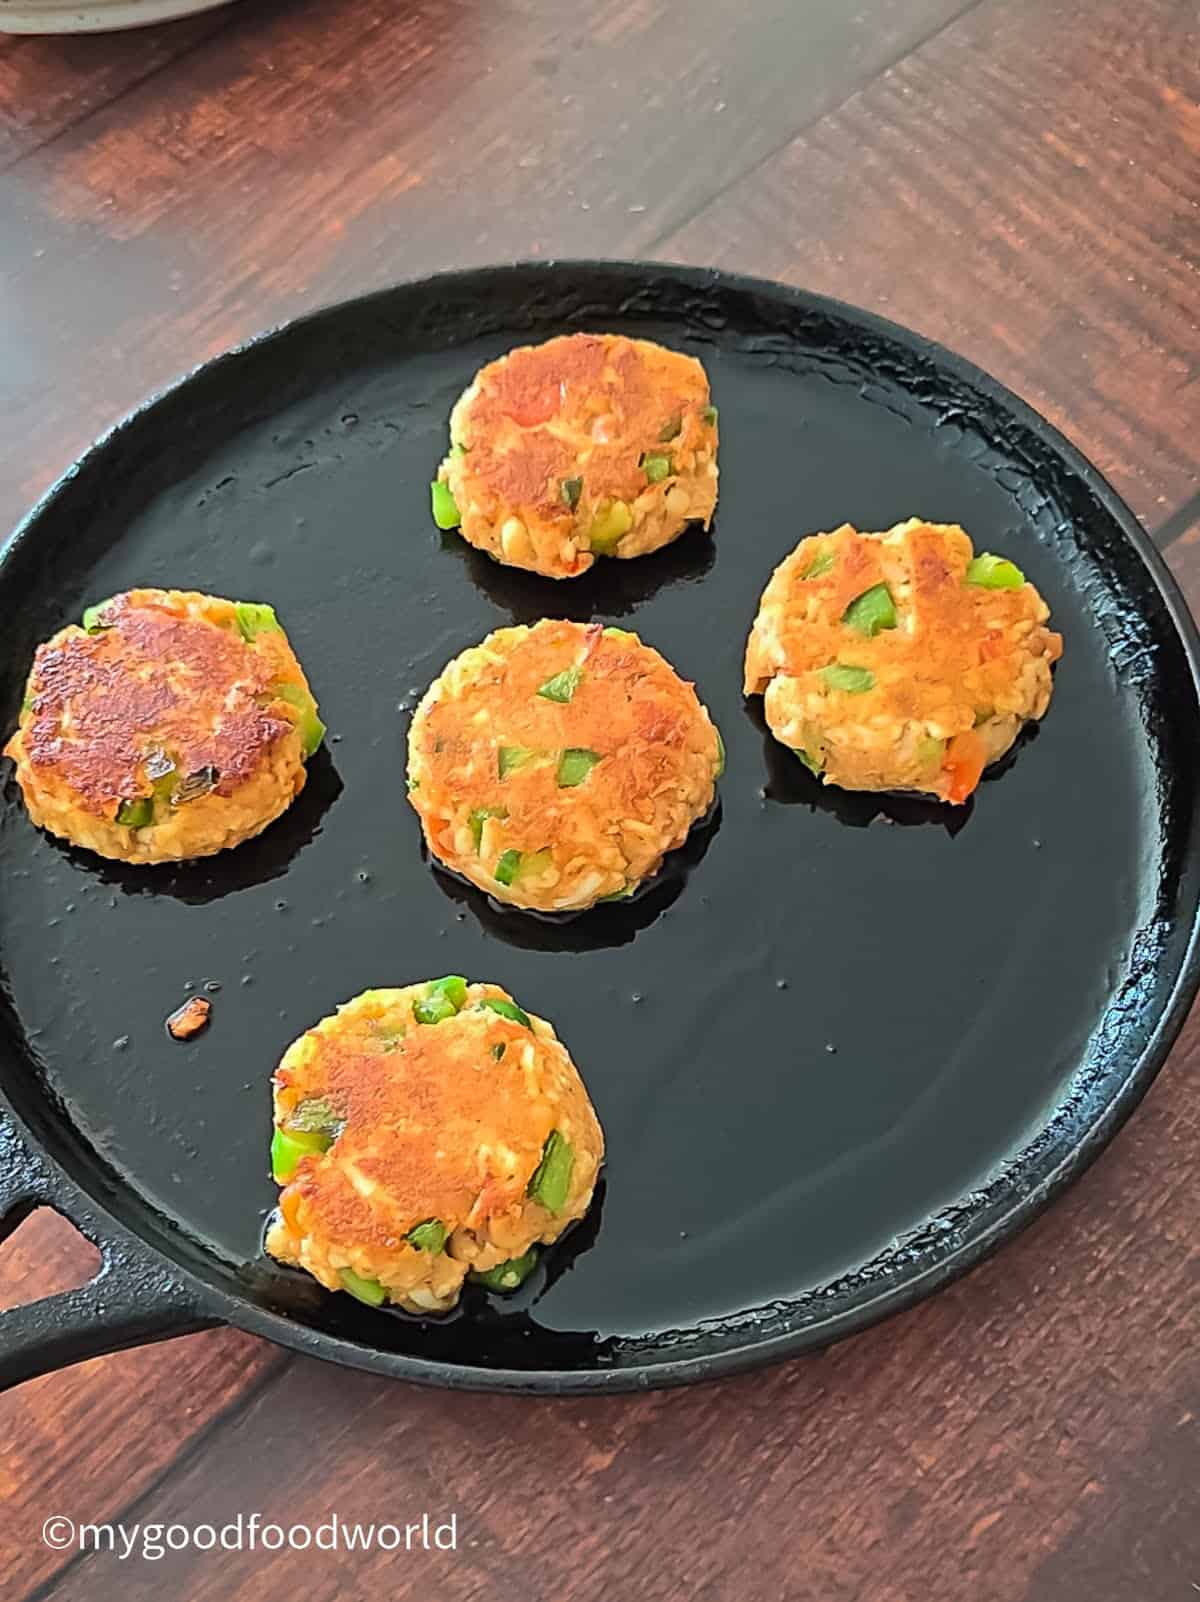
Don't overcrowd the skillet. Frying in small batches helps the cutlets brown properly. I fry about five at a time.
Prefer the oven? Broil (grill) the cutlets
Line a baking tray with parchment (greaseproof/baking paper). Arrange the shaped cutlets on it and dab a little oil on top of each one.
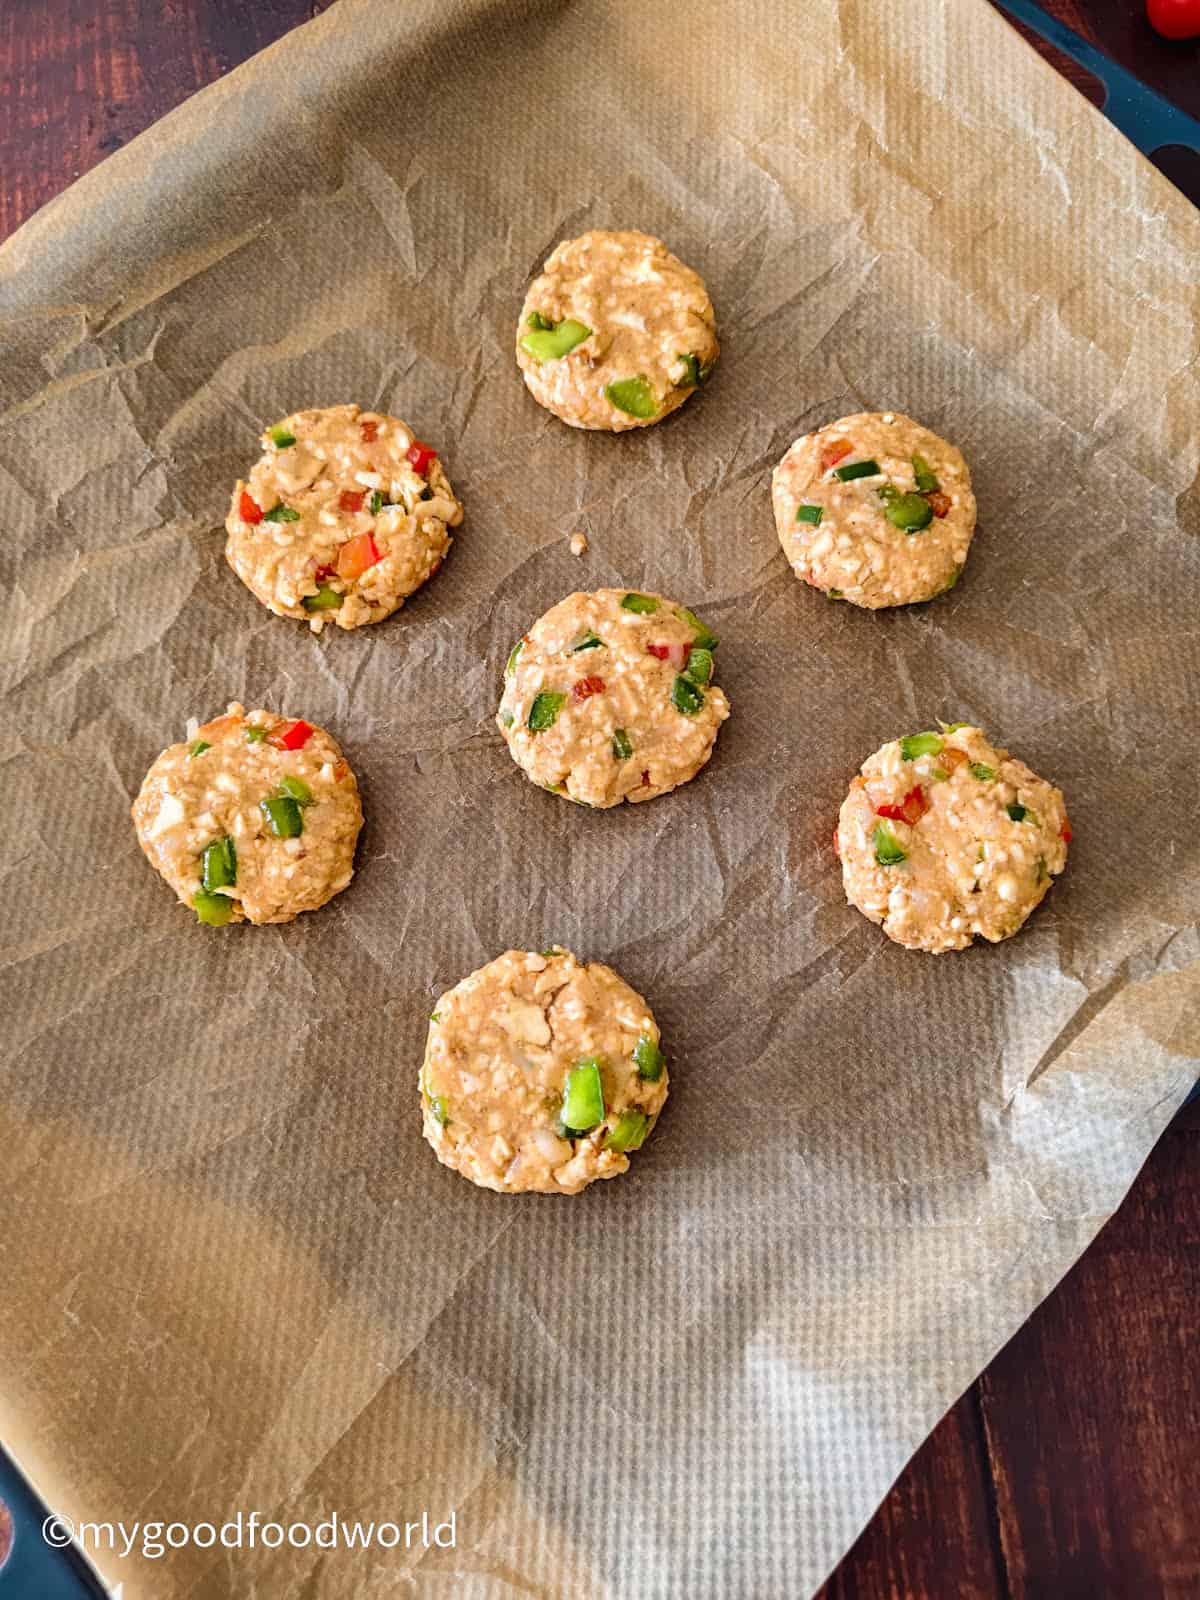
Preheat the grill (called the broiler in the US) for 5 minutes. I use setting 2 on my oven's grill, which is medium heat. Broilers vary a lot, so keep an eye on them.
Place the tray on the second rack under the grill and cook for 7 to 8 minutes, flipping once halfway, until golden brown on top.
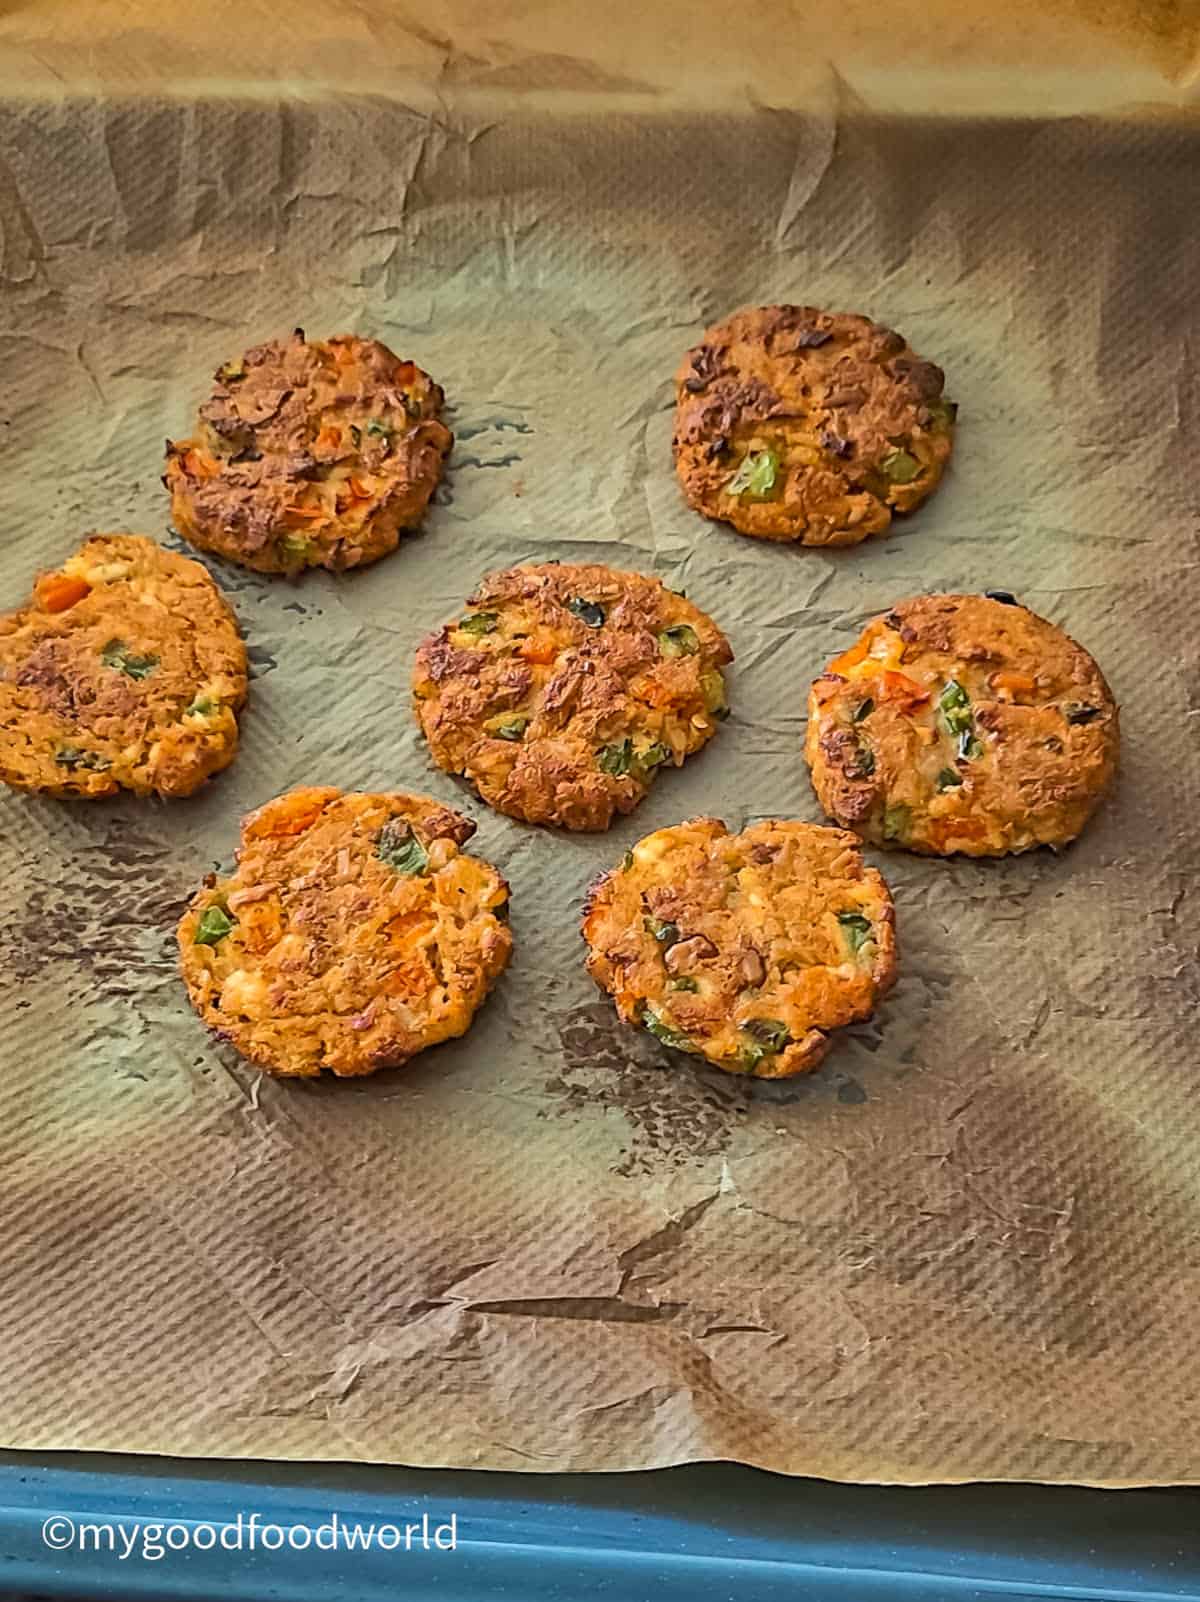
Safety note: Keep the parchment trimmed so it doesn't hang over the tray edges or touch the heating element.
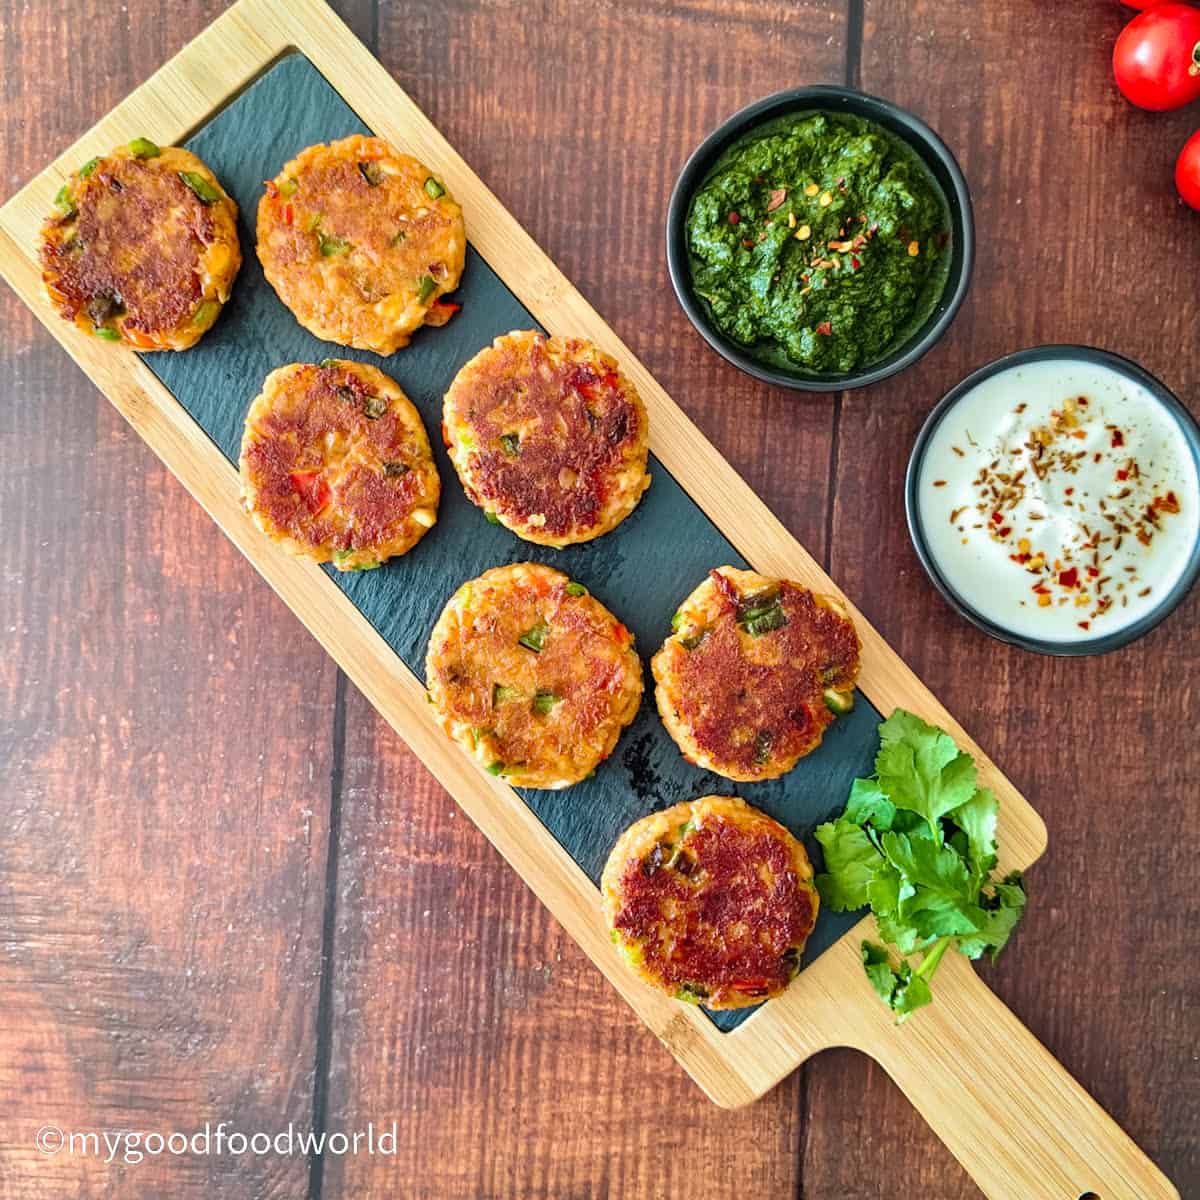
Serve the cutlets warm with green chutney or a dip of your choice. More serving ideas are coming up in a bit.
Tips for Perfect Paneer Cutlets
These are soft cutlets, so a few small habits make the difference between golden and crumbly.
- Do the press test. After mixing, squeeze a little of the mixture in your palm. If it holds together, you're good. If it crumbles, keep mixing.
- Use medium-high heat. The pan should be hot before the cutlets go in.
- Fry in small batches. A crowded pan makes the cutlets steam instead of brown. I fry about five at a time.
- Flip once, gently. Use a thin spatula and give each side its full 2 to 3 minutes before you touch it.
Why are my paneer cutlets falling apart?
Paneer cutlets usually fall apart because the mixture is too soft or too warm, or it needs more binding.
Room-temperature paneer, fully cooled potato, and a little cornstarch keep them together.
- Bring the paneer to room temperature. Take it out of the fridge ahead of time, so it's ready when you start mixing.
- Let the potato cool completely. A warm potato can make the mixture sticky and soft, so boil it ahead and give it time.
- Don't skip the cornstarch. Mine fell apart without it. The bell pepper and walnuts add chunky bits that need extra binding, and the potato alone doesn't hold them.
Serving Ideas
These cutlets are good on their own, but a dip or two makes them a proper snack. Here's what I serve them with:
Green chutney: My green chutney is the classic partner. It's made without garlic, and its fresh, zingy flavor cuts through the rich paneer. Want a second option? Try my mint coconut chutney or chana dal chutney.
Yogurt dip: Plain yogurt, finished with a sprinkle of bhuna jeera and chili flakes, is the cool, creamy contrast. It takes about a minute. If you'd like something more substantial, my cucumber raita and tomato raita both work well here.
On a snack board: Because the cutlets are small, they're easy to pile onto a board for a party. Add the chutney and yogurt dip in little bowls, and let everyone dunk their own.
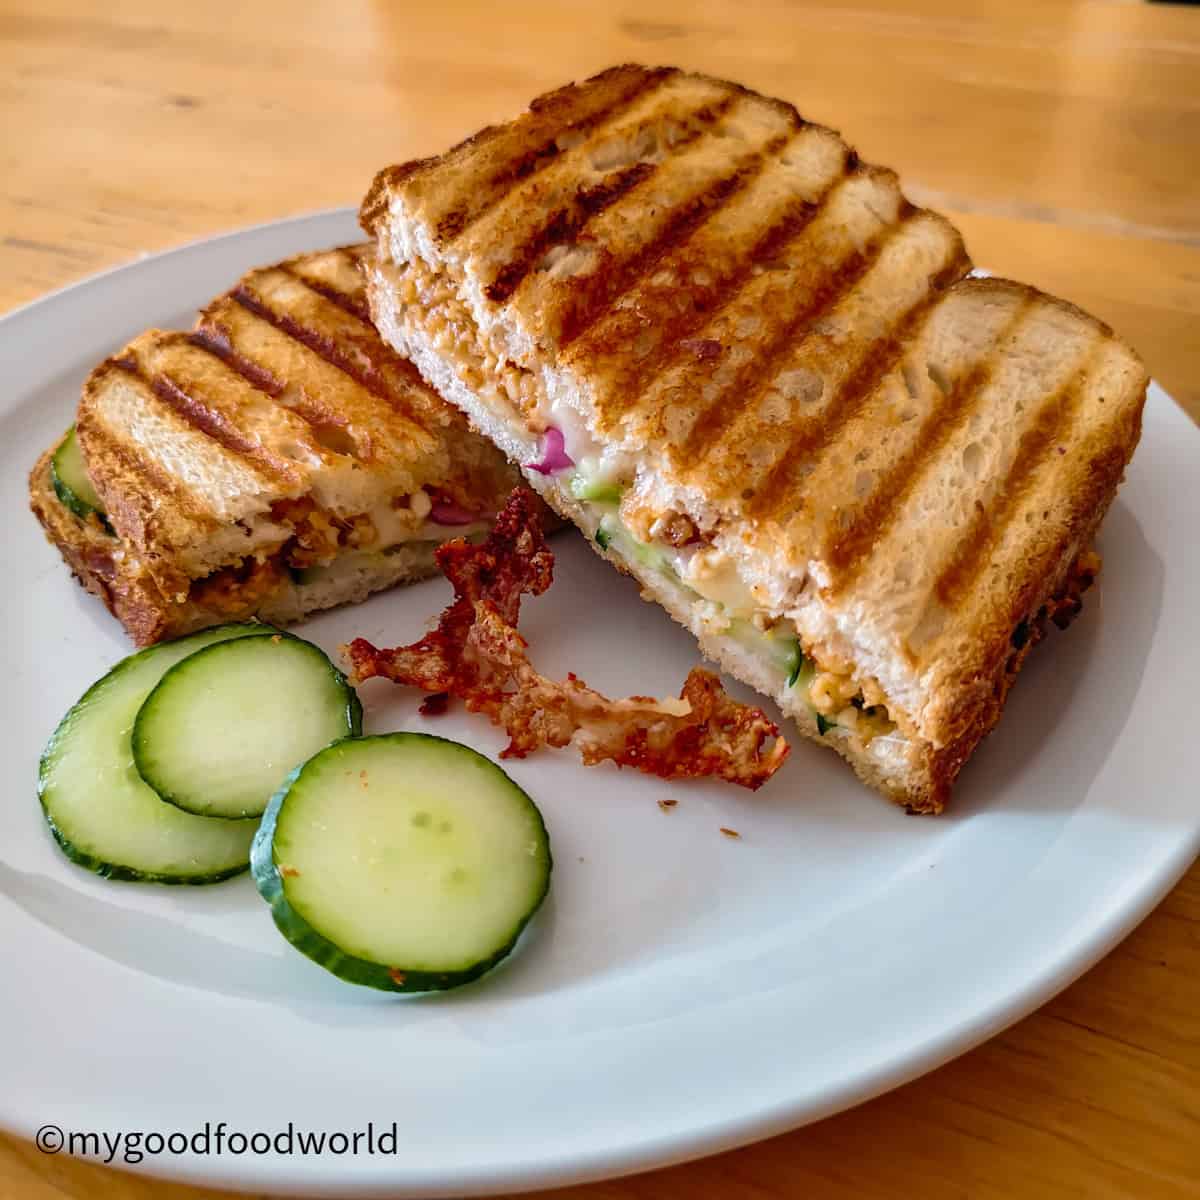
Paneer cutlet toasted sandwich (toastie): A toastie is a good way to turn leftover cutlets into lunch. Mash a cutlet into a sandwich with melted cheese (I use mozzarella), cucumber, and some green chutney. Toast it in a sandwich press until golden and crisp.
Thin slices of onion (or my laccha pyaaz) are a tasty extra, but the sandwich works just as well without them. Use gluten-free bread if you want to keep the whole snack gluten-free.
Make Ahead, Storage, and Reheating
These cutlets are easy to make ahead, which is handy for parties. You can store them raw or cooked.
Store them raw: Shape the cutlets, cover them, and refrigerate for up to 3 days. Fry them fresh when you're ready to serve. Cold cutlets may need an extra minute or so in the pan, so keep an eye on them.
Store them cooked: Keep the fried cutlets in an airtight container in the fridge for up to 3 days.
How to reheat: Warm the cooked cutlets in a skillet over medium heat until heated through.
Can you freeze them? I don't recommend it. I haven't tested frying these from frozen, and without a coating, I'm not sure how paneer holds up. The fridge method works well, so I stick with that.
FAQs
Yes. Paneer cutlet and paneer tikki are two names for the same dish: a small, vegetarian, pan-fried patty made with paneer and potato. Different kitchens use different names, so use whichever one you like. The recipe doesn't change.
It depends on what goes into it and how it is cooked. My cutlets are made with paneer, potato, walnuts, and bell peppers, and I shallow-fry them in a little oil with no breadcrumb coating. You'll find a nutrition estimate in the recipe card, so you can decide how they fit into your day.
Yes, and these are made without them. Boiled potato and a little cornstarch bind the mixture, so there's nothing to coat. They still brown to a golden crust in the pan.
Usually, the mixture is too soft or too warm, or it needs more binding. Use room-temperature paneer and fully cooled potato, and don't skip the cornstarch. Mine fell apart without it, because the bell pepper and walnuts need extra binding. (Learn from my crumbled mistakes.)
They're made with gluten-free ingredients: paneer, potato, walnuts, almond flour, bell peppers, and cornstarch. Still, check the labels on your cornstarch and spices, since packaging varies. If you make the toastie, use gluten-free bread. Browse more gluten-free recipes.
Yes. The charcoal step is optional. Smoked paprika alone gives the cutlets a mild, warm smokiness. Charcoal turns it up if you want a stronger flavor.
You can make them ahead. Refrigerate the shaped raw cutlets or the cooked ones for up to 3 days. Fry the raw ones fresh (they may need an extra minute since they're cold), or reheat the cooked ones in a skillet over medium heat until heated through. I don't recommend freezing. I haven't tested frying them from frozen, and without a coating, I'm not sure how paneer holds up.
It depends on the mood. For a decadent weeknight meal, I reach for my shahi paneer. For a snack, a party platter, or something to dunk in chutney, these cutlets win.
Made this recipe? I'd love to know what you think! Leave a ★★★★★ rating and a review below; it motivates me to create more great content for you. You can also connect with me on Facebook and Instagram. And don't forget to subscribe to my newsletter, where I share free recipes, tips, and more!
📖 Recipe
Walnut Paneer Cutlet (Paneer Tikki): Smoky & Gluten-Free
Save This Recipe
Enter your email & I'll send it to your inbox.
By submitting this form, you consent to receive emails from MyGoodFoodWorld
Ingredients
Equipment
Instructions
- Grate the boiled potato.1 large (~200g; 7oz) potato, boiled and peeled
- Grate the paneer.1 block (~200g; 7oz) paneer, full fat
- Chop the walnuts finely. Peeling is optional, but leaving the skin on adds texture.10 halves (~40g) walnuts, soaked
- Chop the bell pepper (capsicum) into small cubes.1 medium-sized (~125g) bell pepper (capsicum)
- Measure the remaining ingredients and keep them ready.
- Add the grated paneer and potato to a bowl, then add the walnuts, peppers, and remaining ingredients. Mix well until the mixture holds together when you press it.¾ teaspoon salt, ½ teaspoon black pepper, freshly ground, 3 tablespoons almond flour (ground almonds), 1 tablespoon cornstarch (corn flour), 1 teaspoon smoked paprika
- Using tongs, hold a piece of natural lump charcoal over a gas flame until it glows red and is covered in gray ash. Place it in a small heat-proof bowl.
- Make a well in the center of the mixture and set the bowl in it. Add a couple of drops of oil or melted ghee to the charcoal.
- Once smoke rises, cover the mixture with a lid. Let it smoke for 5 minutes for a mild smoky flavor, or longer for a stronger one.
- Remove the bowl with tongs and discard the charcoal only when it has cooled completely. Stir the mixture once before shaping.
- Take a golf ball-sized portion of the mixture and shape it into a ball. Place it on your palm and press gently to flatten it into a small round.Repeat with the rest of the mixture.
- Heat a little oil in a skillet over medium-high heat. Add the cutlets and cook for 2 to 3 minutes, or until golden and crisp underneath.Flip gently with a thin spatula (they're soft) and cook the other side for another 2 to 3 minutes, or until golden, adding a few more drops of oil if needed. Repeat with the rest.2 tablespoons oil or ghee for frying the cutlets
- Line a baking tray with parchment (greaseproof/baking paper). Arrange the shaped cutlets on it and dab a little oil on top of each one.
- Preheat the grill (broiler in the US) for 5 minutes. I use setting 2 on my oven's grill, which is medium heat. On a US oven, start with Low broil.
- Place the tray on the second shelf from the top, under the grill, and grill for 7 to 8 minutes, flipping the cutlets halfway through, or until they are beautifully golden brown on top.
- Serve warm with a chutney or dip of your choice.
Nutrition
The nutritional information is calculated using an online calculator and is based on available ingredients and preparation. It should not be considered a substitute for a professional nutritionists' advice. Changing the quantities and cooking technique will alter the nutritional calculations.
Video
Notes
- Paneer: I used full-fat paneer. Low-fat works too, but full-fat gives the best taste and texture.
- Potatoes: Use an all-purpose potato such as Yukon Gold. Very floury potatoes can turn crumbly when grated, and the cutlets won't hold together as well.
- Walnuts: I soaked mine for 24 hours (in the fridge, changing the water once) and chopped them with the skins on. If you're in a rush, raw walnuts are fine. Almonds work well too, or use a mix of the two.
- Bell Peppers: I used green and red for a pop of color. Use whatever you have on hand.
- Almond Flour: Also called ground almonds. I use finely ground blanched almond flour.
- Smoked Paprika: This gives the cutlets their smoky flavor, even if you skip the charcoal step. If you're not a fan, use regular paprika. Cayenne works too, but it's much hotter, so start with a small pinch.
- Oil or Ghee? I used oil here. Ghee gives a richer, nuttier flavor.
- Infusing smoke with live coal: It's optional, but it adds a great smoky depth. Please follow the safety instructions in the method above.
- Allergens Note: This recipe contains tree nuts (walnuts and almonds) and dairy (paneer, plus ghee if you use it). If you're avoiding gluten, check the labels on your cornstarch and spices.
Alternative quantities provided in the recipe card are for 1x only.
Our content aims to be informative and educational, but it should not replace professional medical advice. Since manufacturing processes can vary and cross-contamination is possible, it's essential to verify product labels and allergen information. Make sure all ingredients align with your specific allergies. As readers, you bear the responsibility for ensuring allergen safety when buying or consuming foods.



Padma Kumar says
Sounds delicious. Cannot wait to try it!